
Espresso and open source hardware?
Making an espresso machine from (almost) scratch.

Why?
I love well made espresso. It’s one of my favorite things to look for when I travel, and my social world revolves around cafes. The centerpiece of any café is the espresso machine. They are complicated, mysterious, hard to maintain, and very, very expensive. Who wouldn’t want to bring that experience home?
The start of an idea
I have a good home espresso machine, a Gaggia Classic Pro, and I use it every day. It replaced an Espresso Gaggia that was wearing out after many years on my counter. Not the fanciest or the most expensive, but it is reliable and most importantly it is what I’m used to.
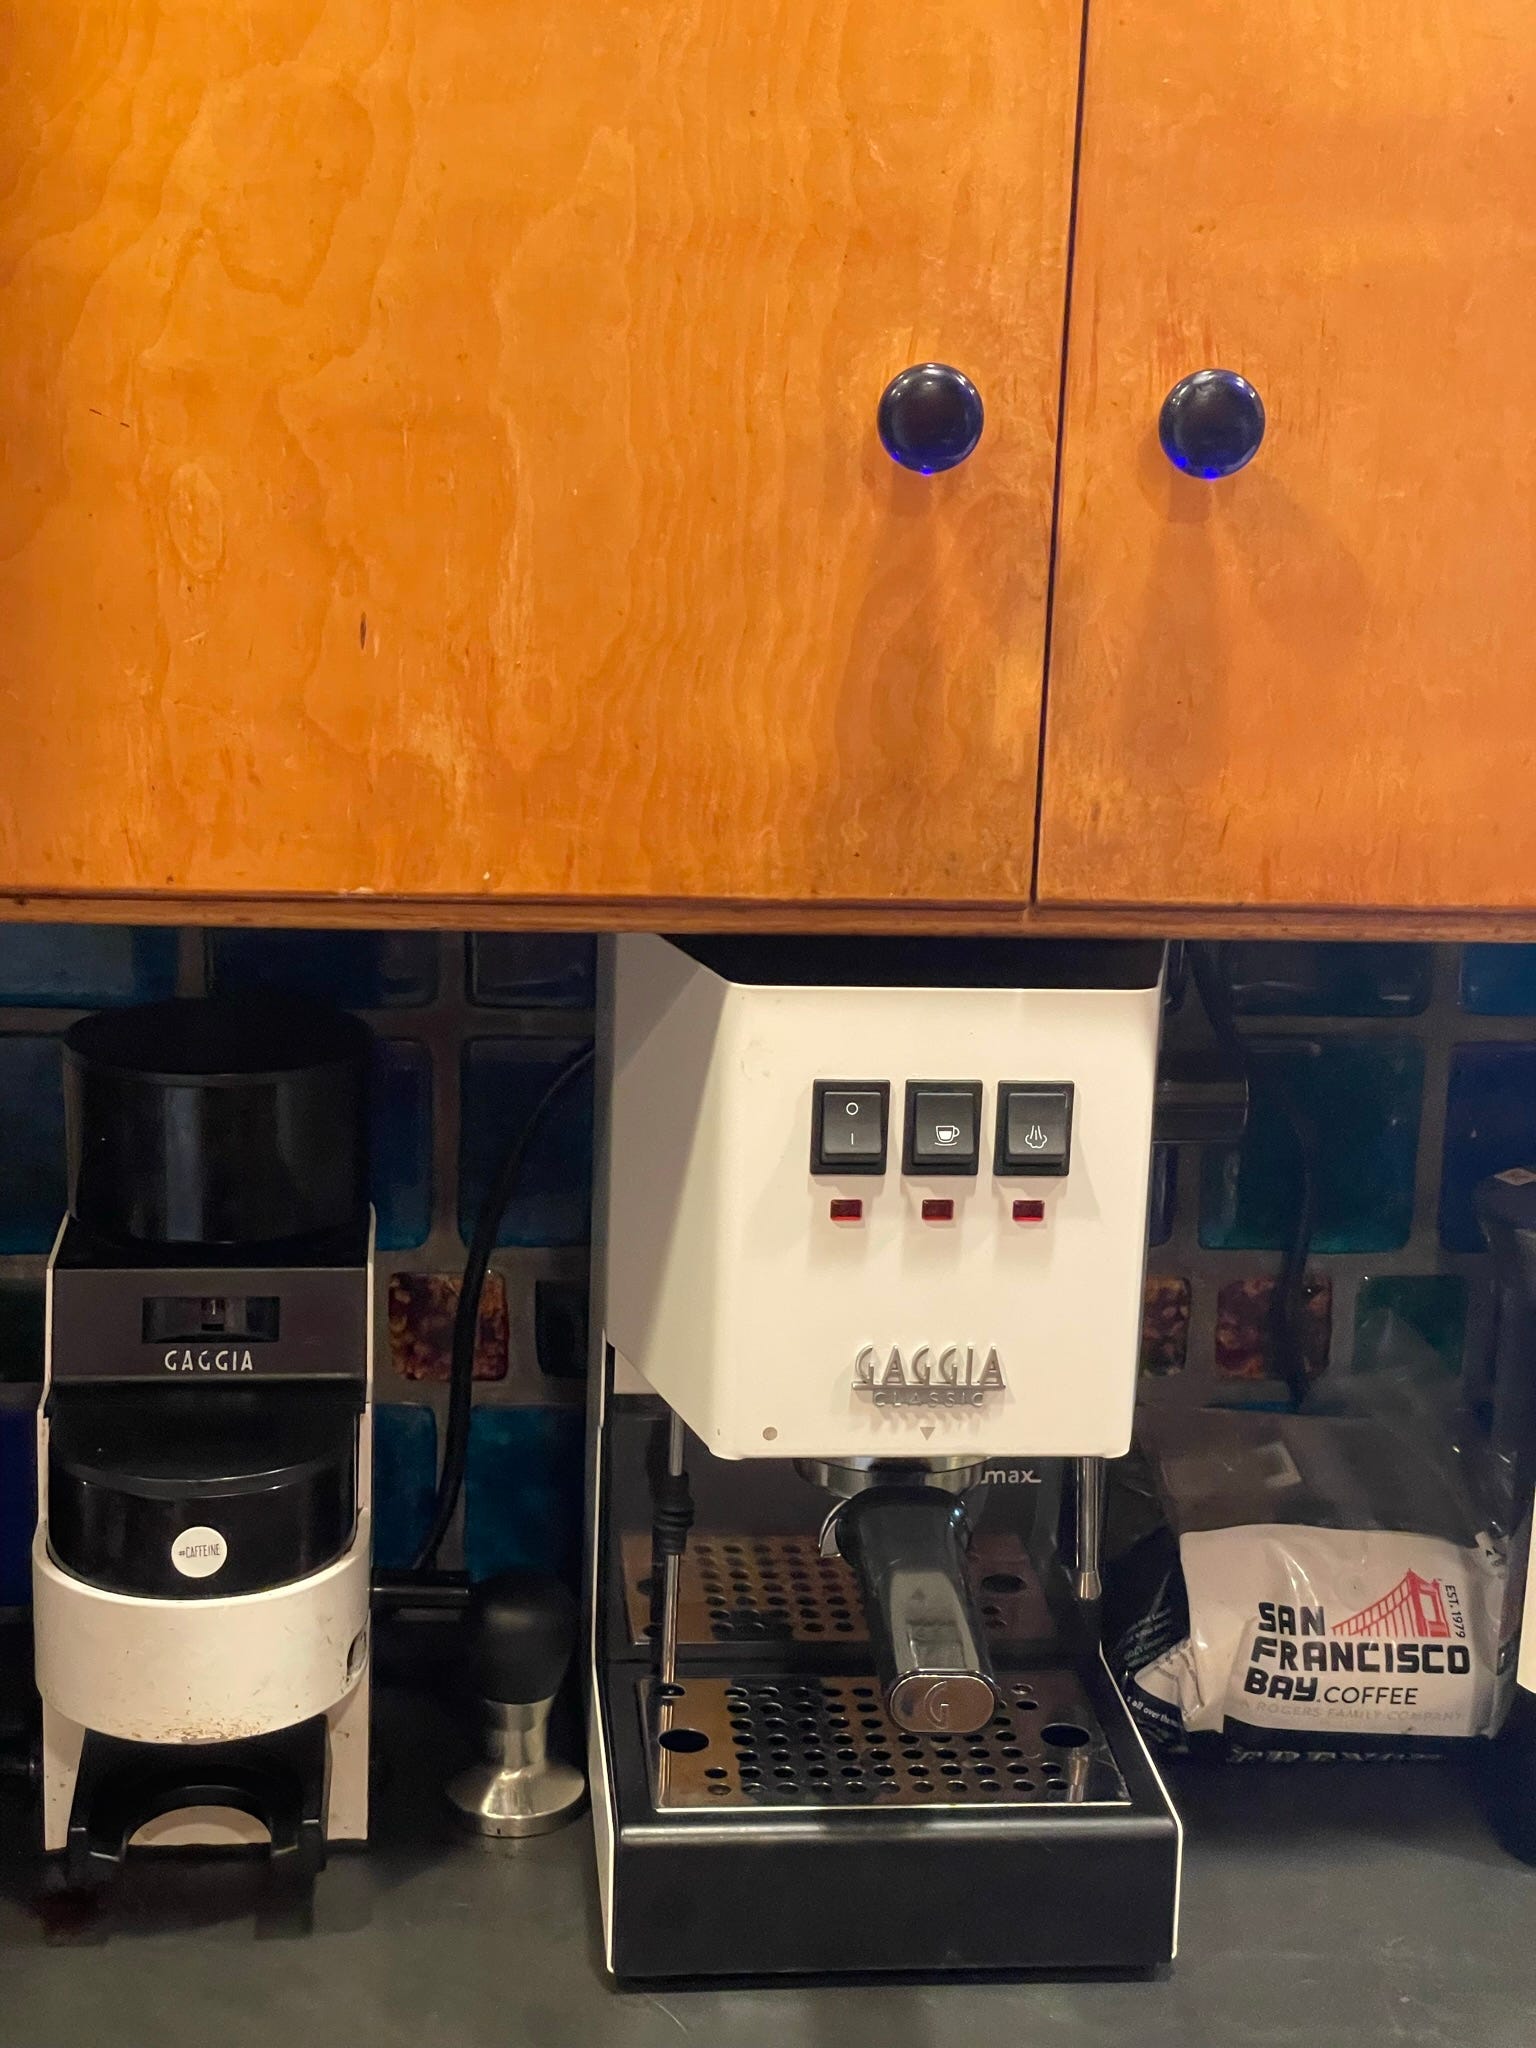
On the other hand, I constantly hear experts talk about other machines, other techniques for making the perfect shot, and I see many suggestions for how I can mod my own machine to make it even better. That is a dangerous idea when the machine they want me to change produces my morning coffee - the last thing I want to do is break it.
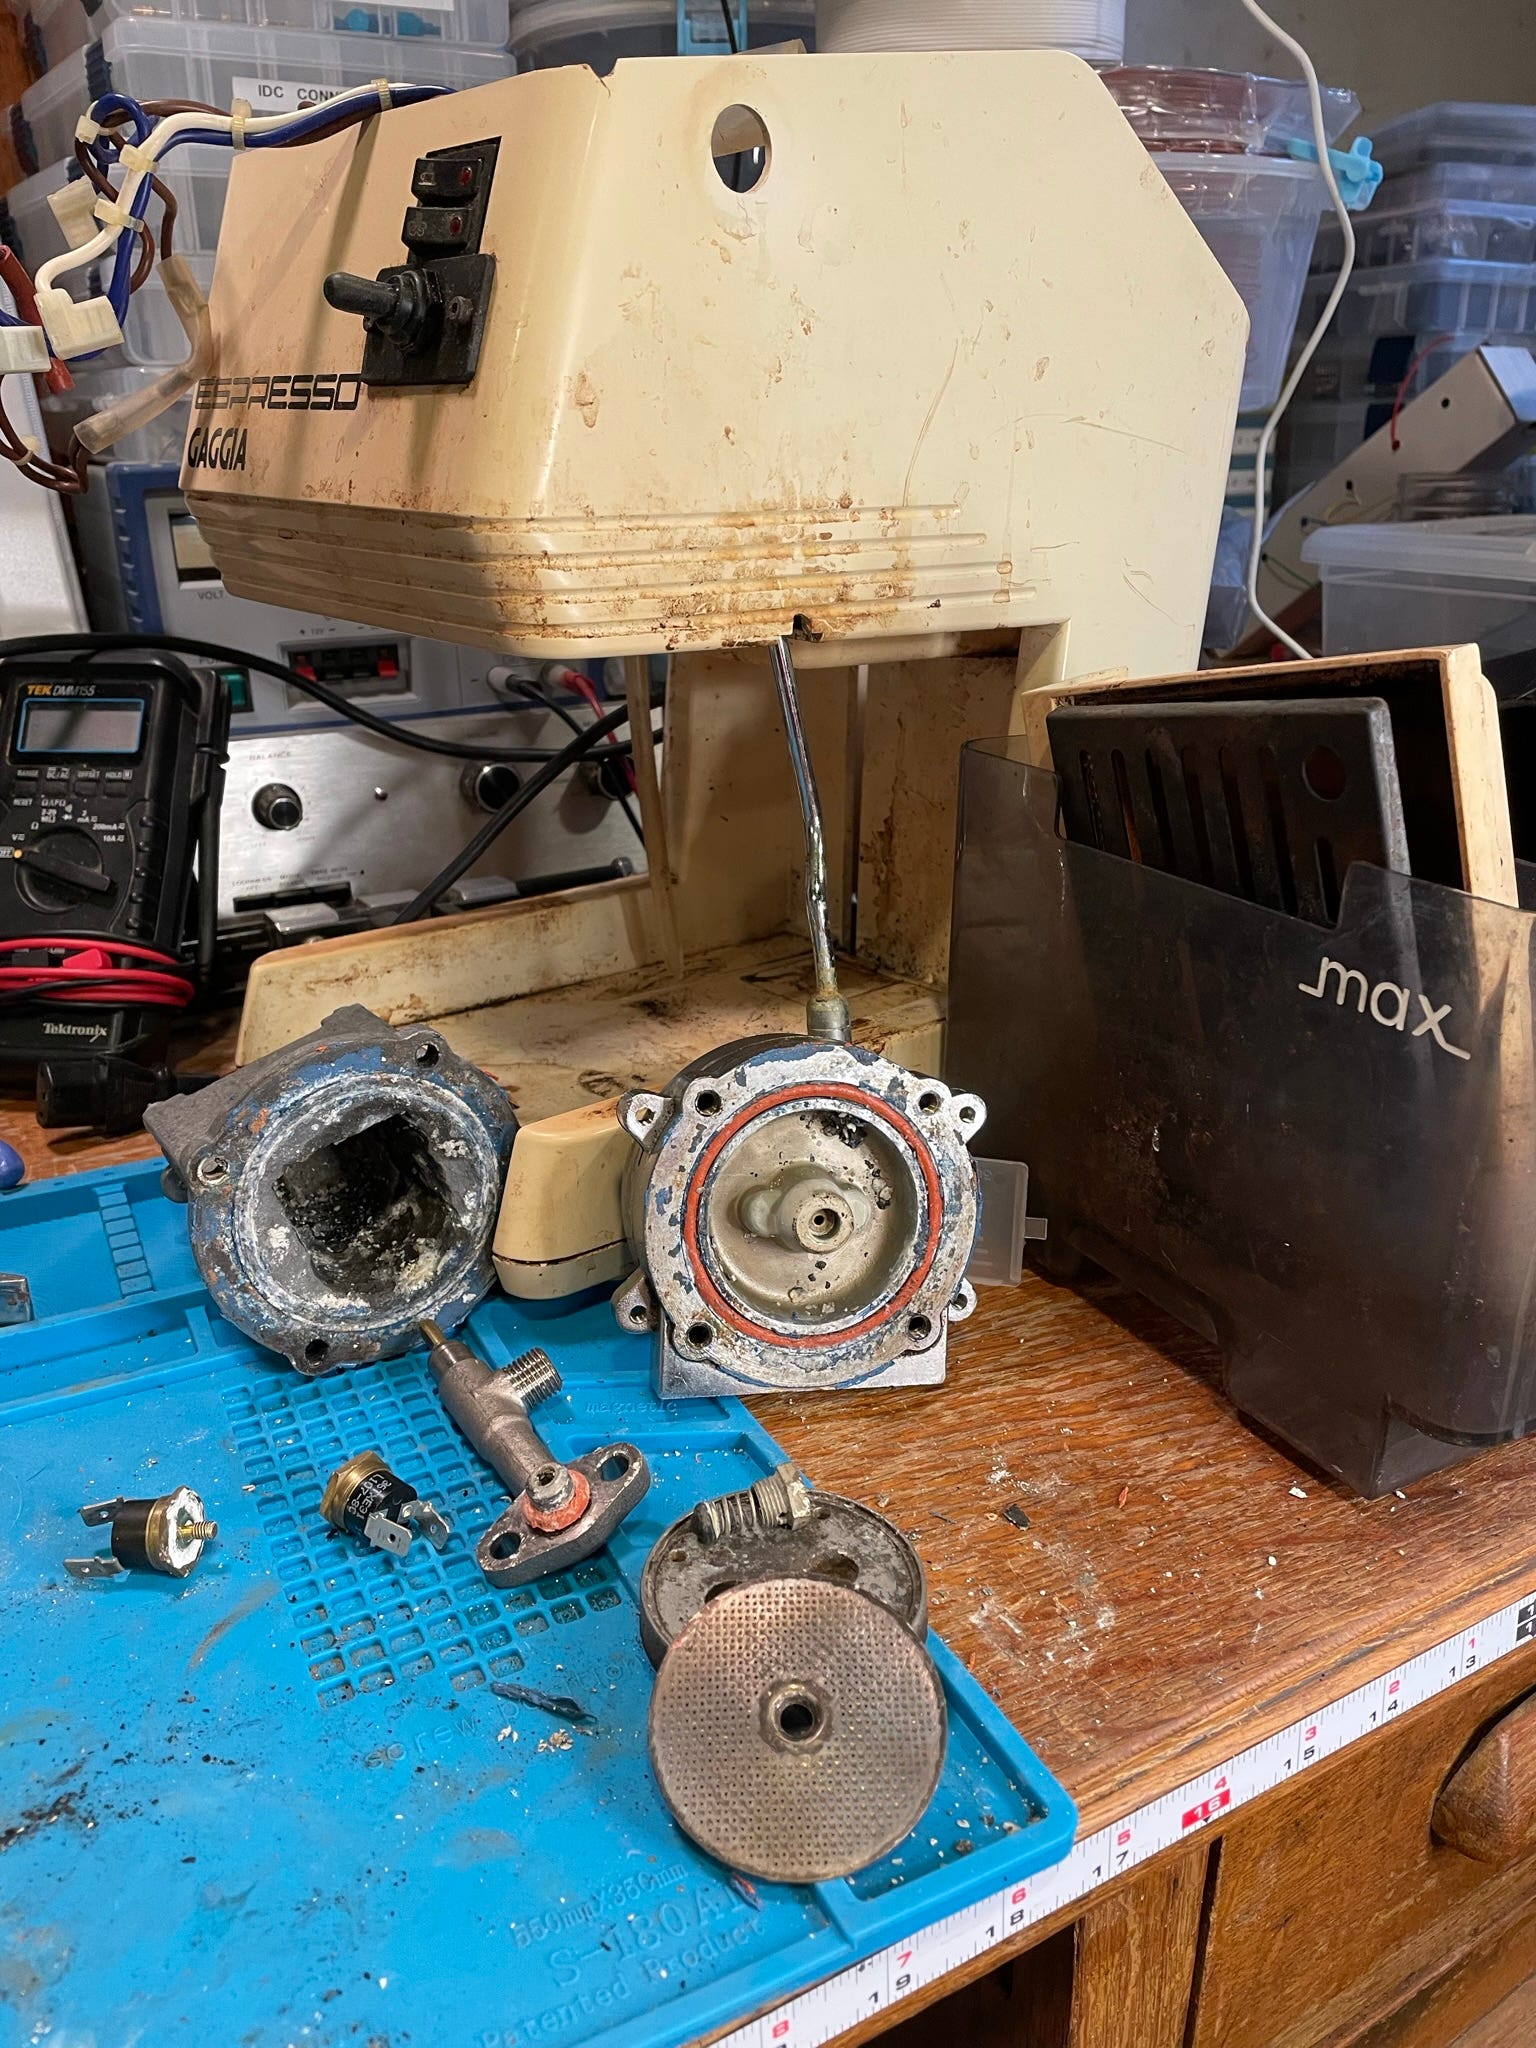
After my old Espresso Gaggia was replaced, I took it down into the shop and disassembled it to see what had gone wrong.
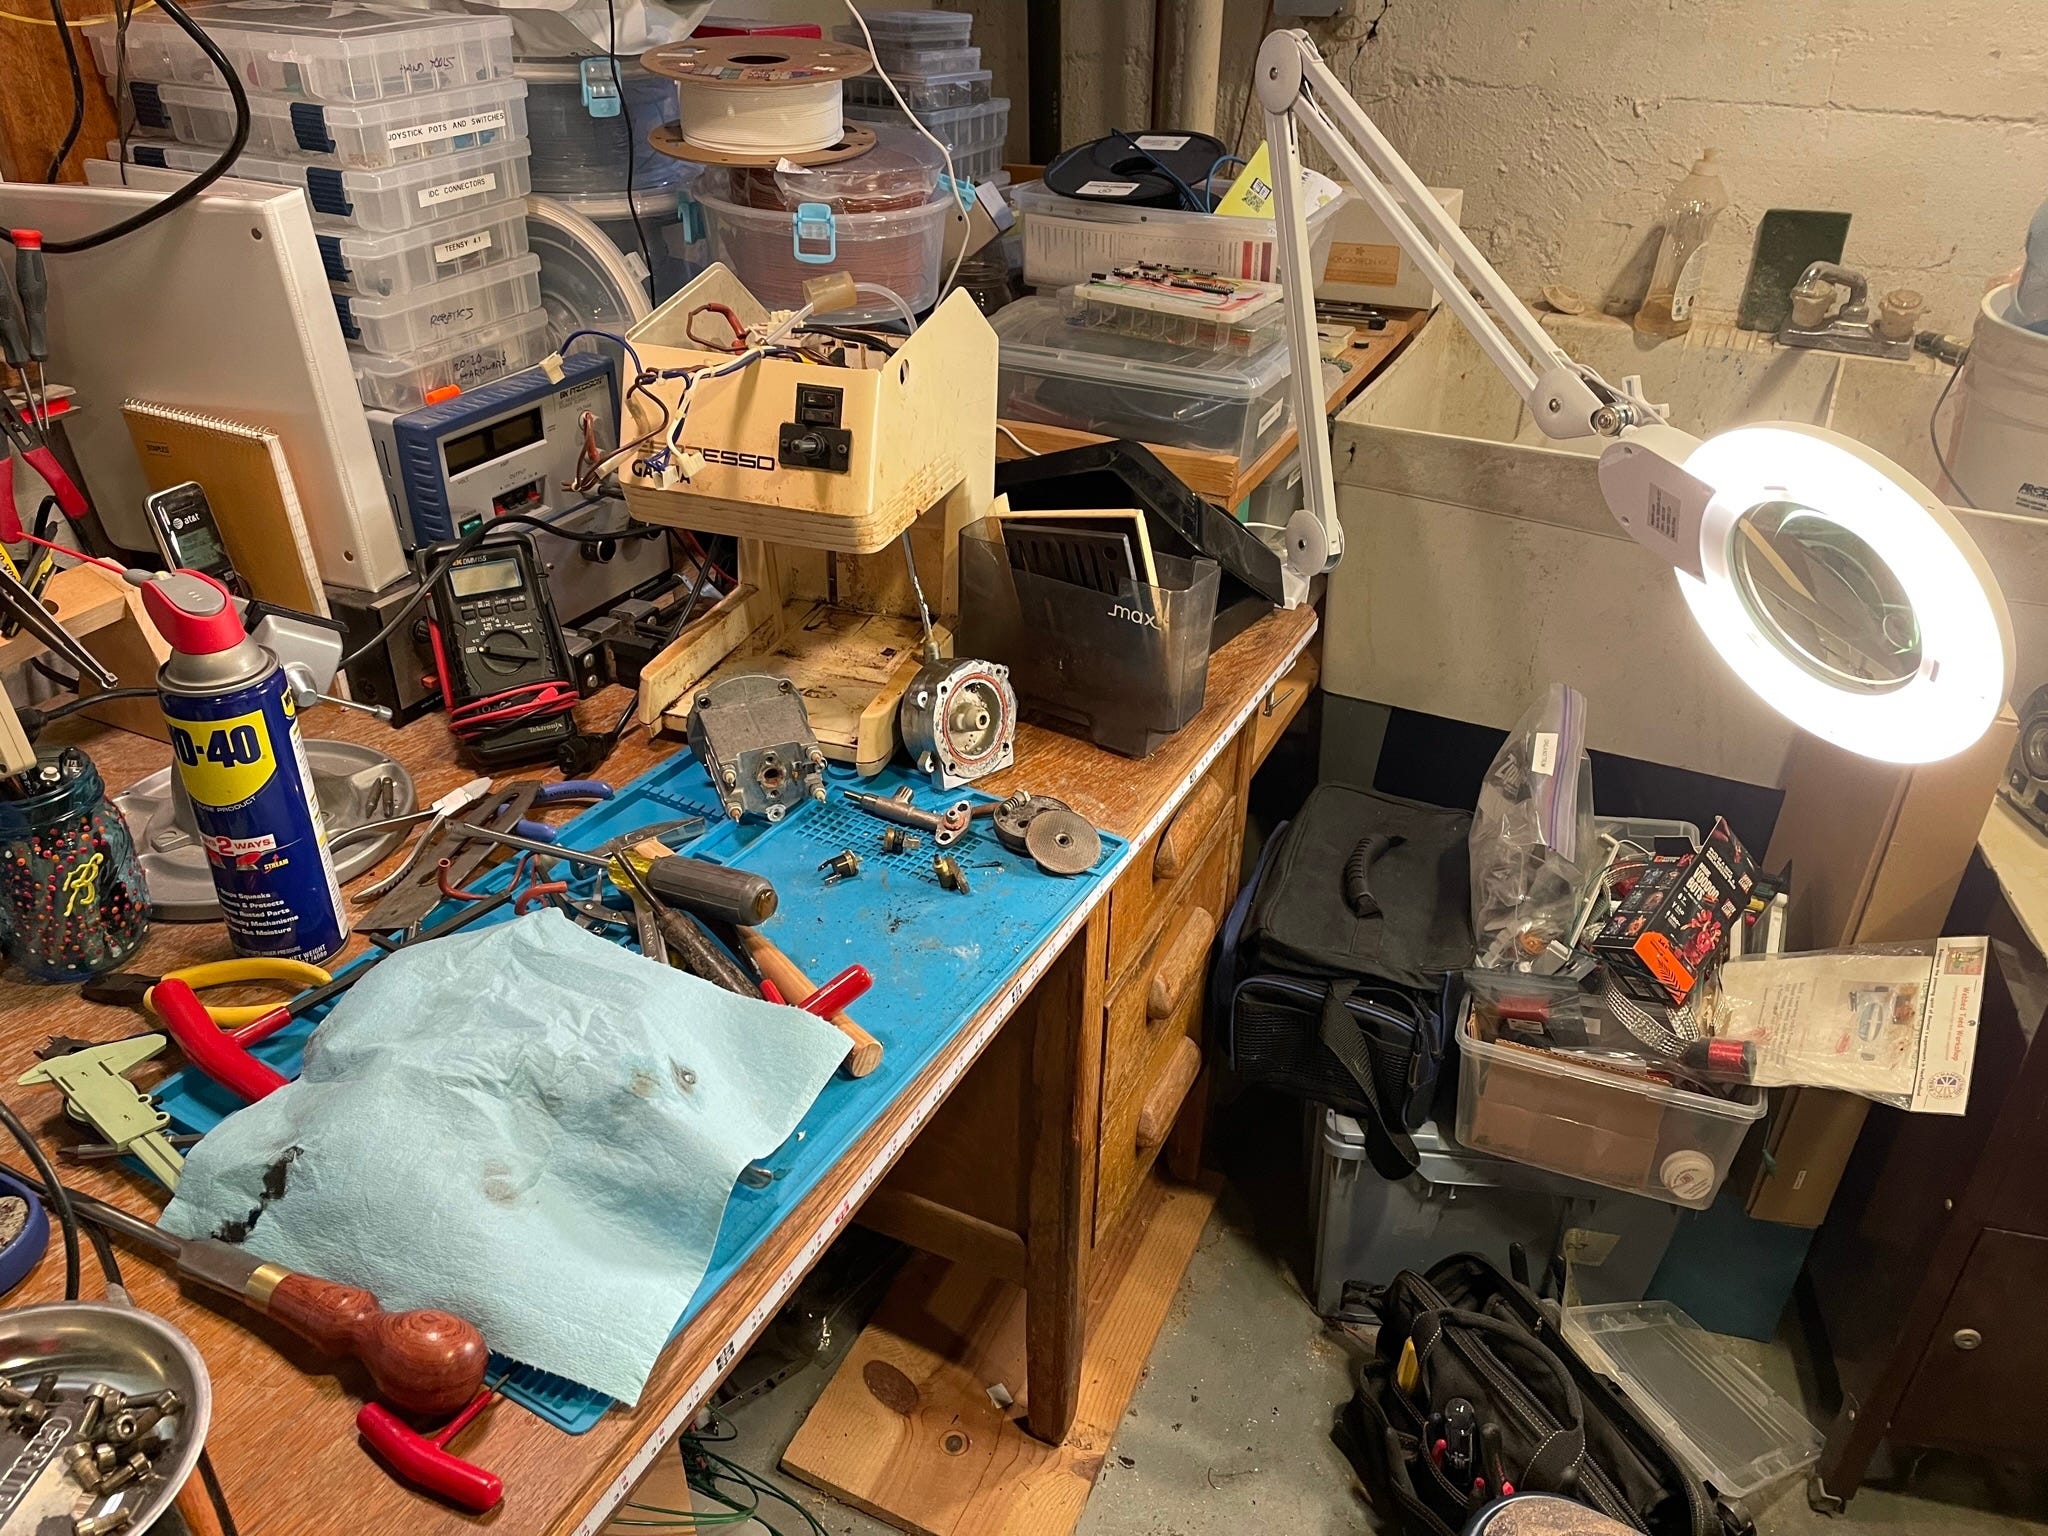
As it turned out it was just corrosion - lime scale in the boiler which was blocking the flow of water. The pump still pumped and the boiler still boiled, and I started to have an idea. I now had a platform for experimentation, to try out some of the crazy things I was seeing on YouTube and online.
Enter Gaggiuino
One of my favorite espresso project sites is run by Zer0-bit and is called Gaggiuino. They take a Gaggia Classic Pro and add computer control and a graphical interface to allow detailed control of the espresso brewing process.
I didn’t want to mess with my new machine, and the housing of my old machine was pretty much worn out, so I started to think about how I could build a new machine using a few parts from my Espresso Gaggia, and the hardware and software specified by Zer0-bit and the community for the Gaggiuino project.
Gaggiuino is shared under a creative commons license, which allows the software to be used in a non-commercial setting, and I started wondering how practical it would be to build a matching open-source hardware espresso machine based on that software. This project was the result.
The project
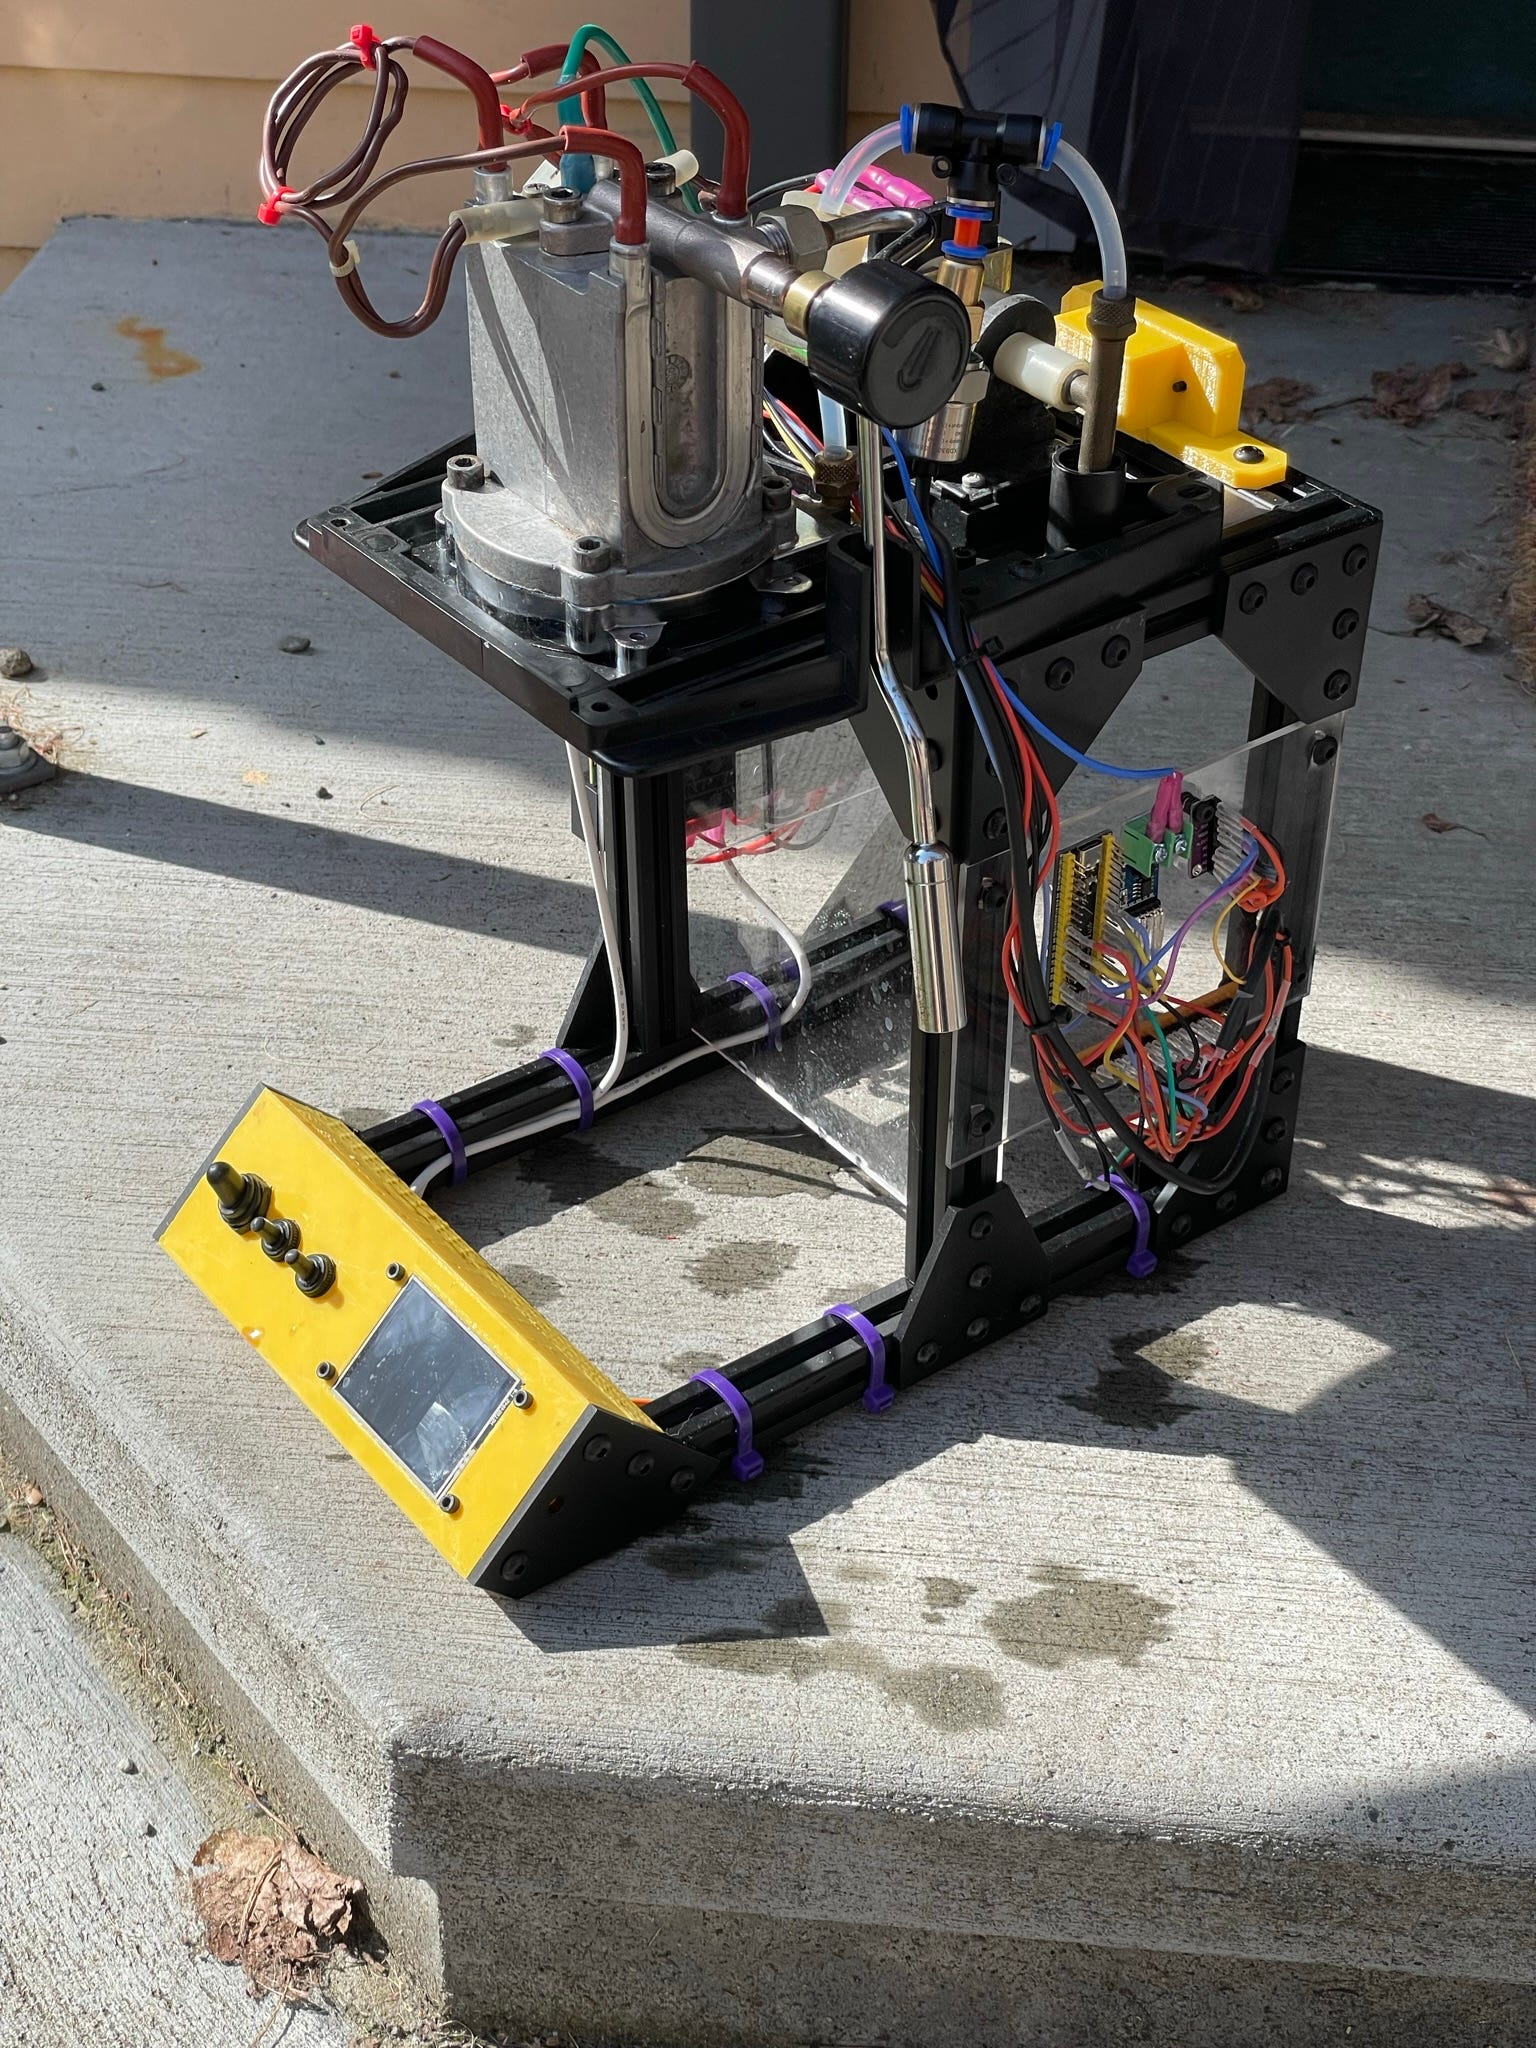
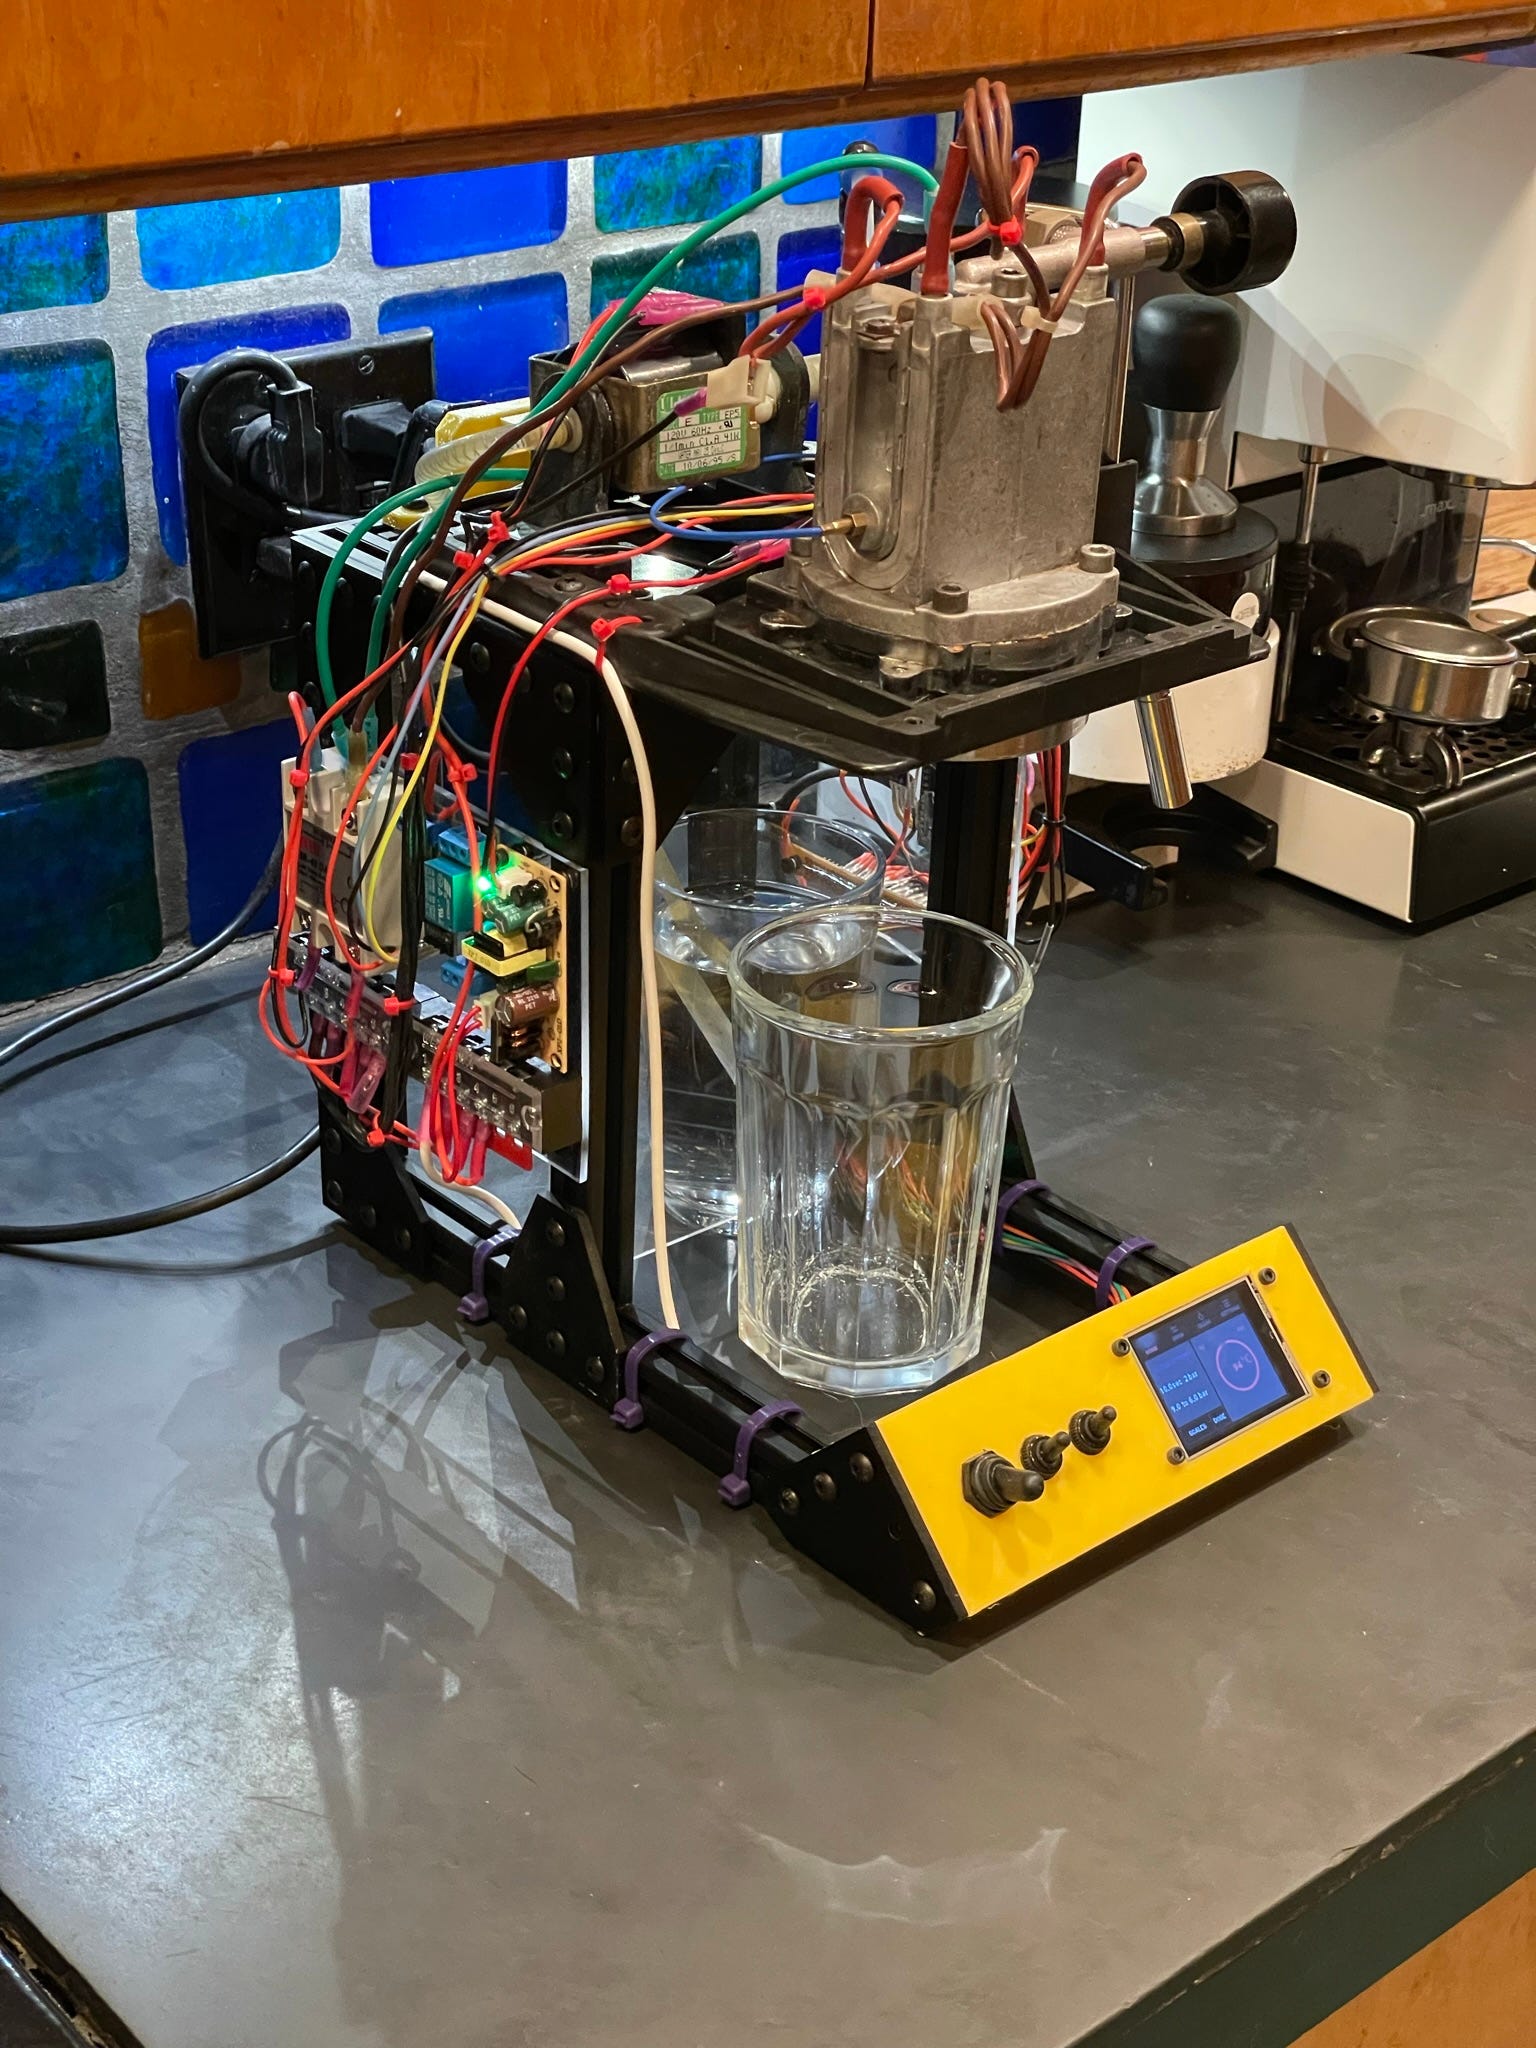
I don’t have a name for the machine, so let’s just call it “The Project, v.0.1”. It is a first pass at an open platform for experimenting with the computer control of an espresso machine. It is also intended to be a way of identifying parts which are proprietary in the hope that generic replacements might eventually be made.
Subsystems
Hydraulics
The hydraulic system is made up of:
A pump with a pressure sensor. These are generic parts which can be sourced from many third parties.
A boiler with a temperature sensor. The boiler is salvaged from my Espresso Gaggia espresso machine.
An overpressure valve. This ls also a Gaggia part.
A brew head that allows for the attachment of a standard 58mm portafilter, and includes a manifold to evenly distribute hot water over packed espresso grounds. These are mostly Gaggia parts although the shower screen, brass screen holder, and other parts are third party.
A 58mm portafilter and basket. This is a generic part, although again I’m using salvaged Gaggia parts.
PTFE tube to connect the components.
Pneumatic quick couplers to attach the pressure sensor to the line between the overflow valve and the boiler.
The Espresso Gaggia does not have a 3-way solonoid so that is not part of this build, although I may add one since it is supported by the software.
Chassis
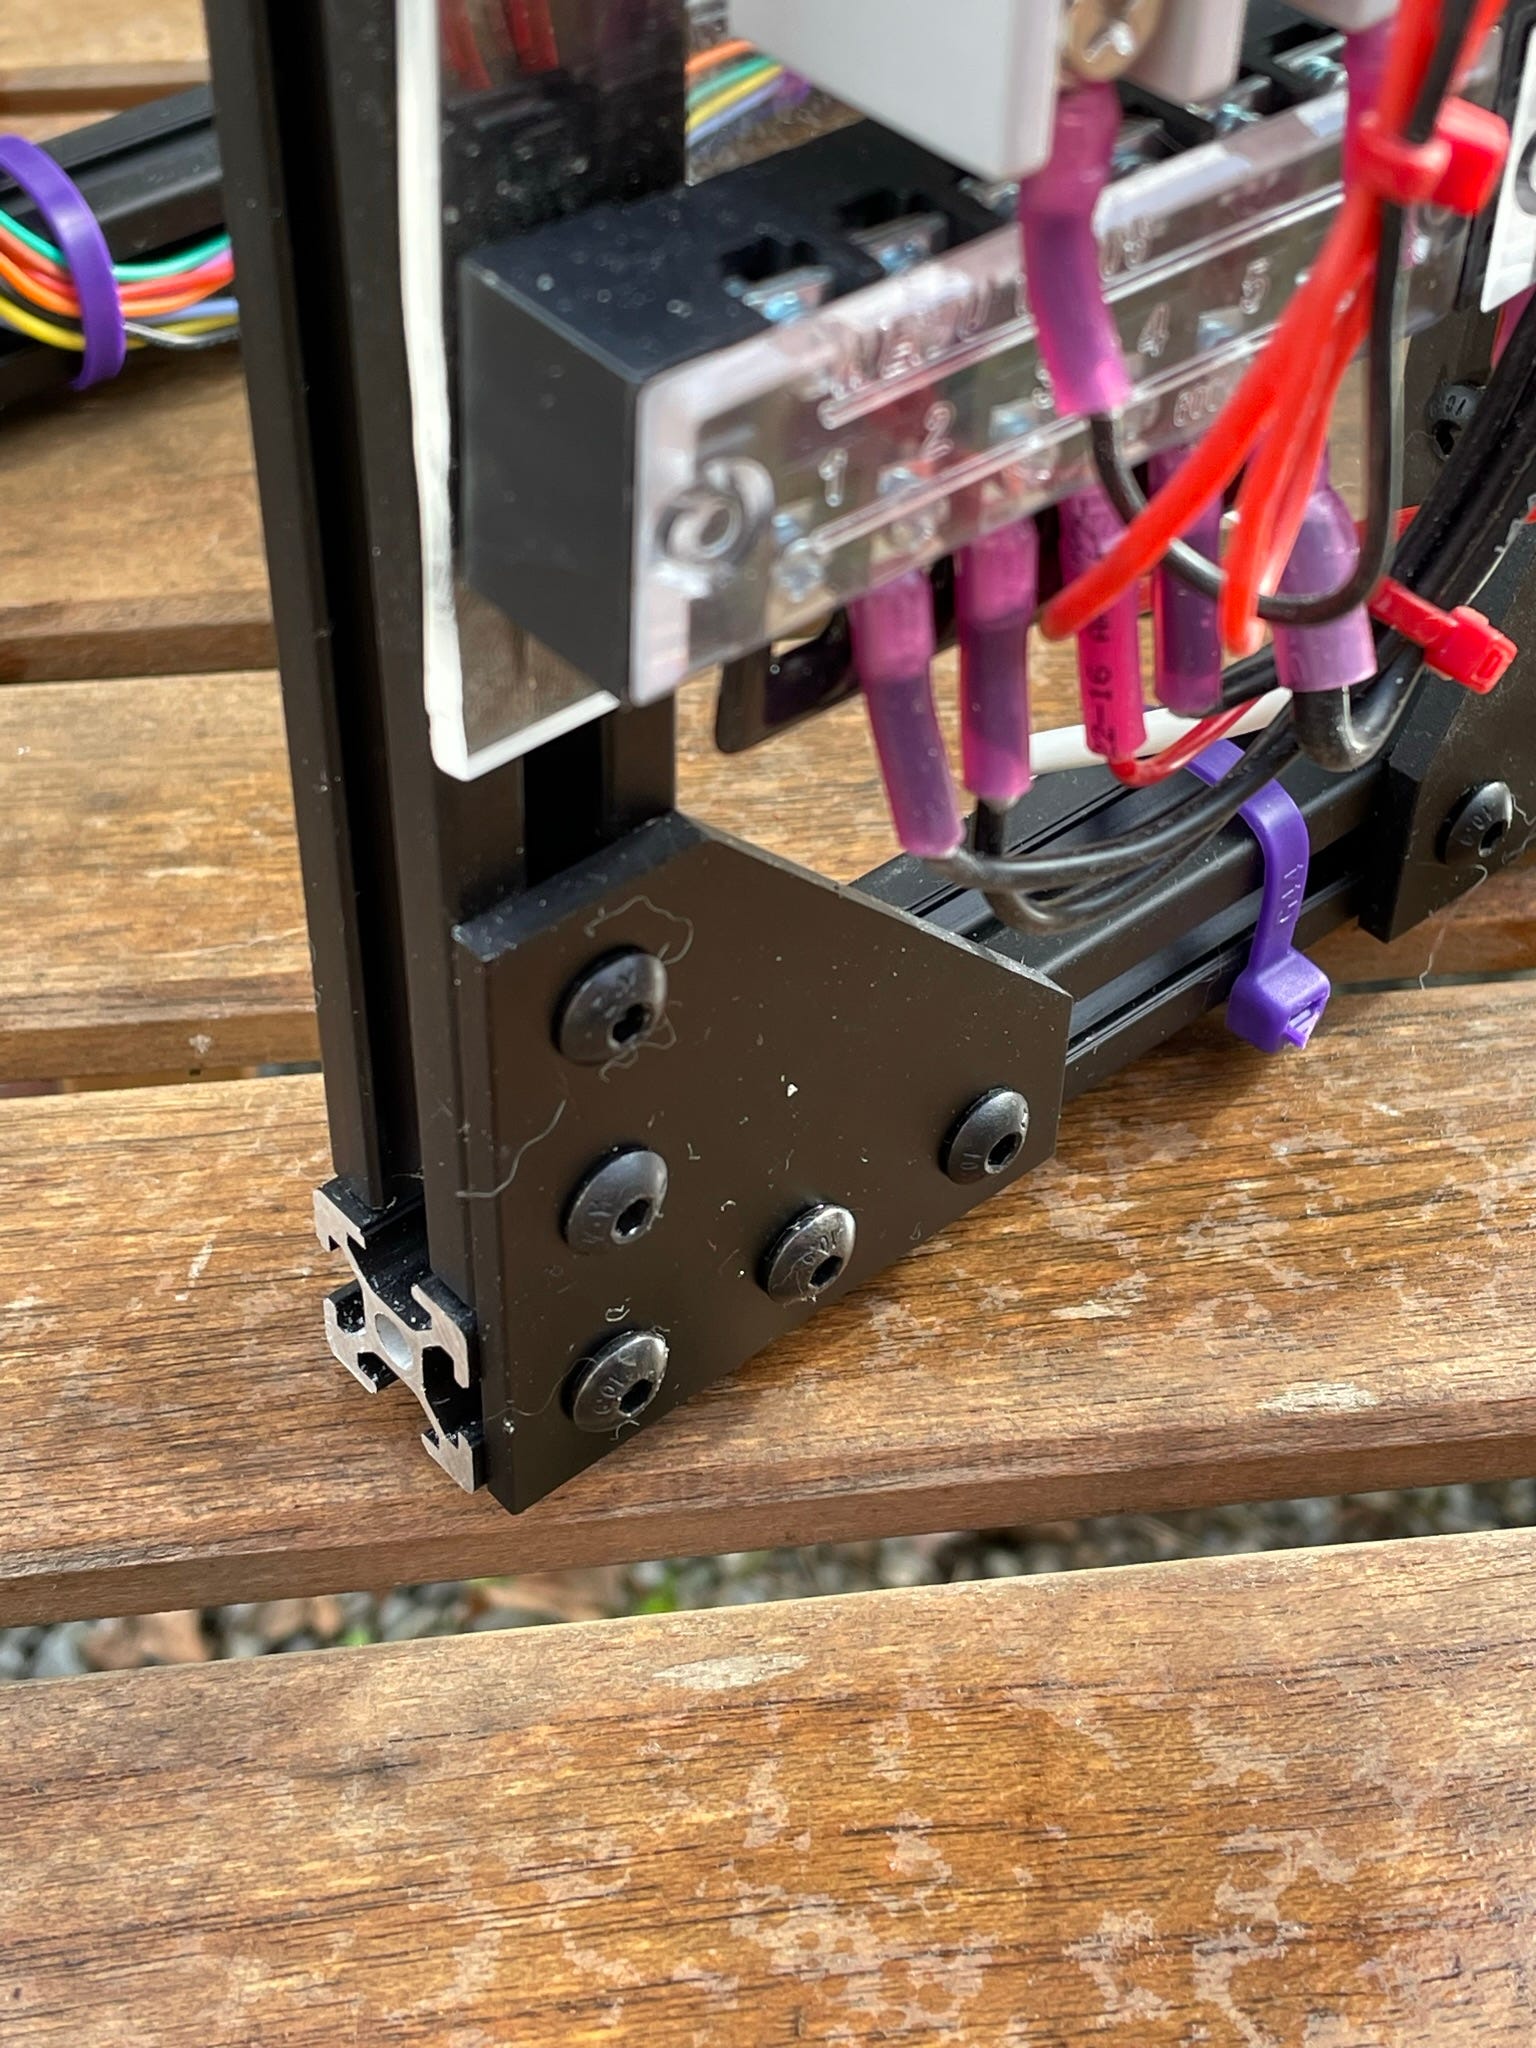
I used generic 2020 extrusion rails to make the chassis since I was familiar with them from building 3D printers and CNC routers. These rails are inexpensive and sold from many vendors in the US and China. The chassis was assembled using stiffening plates and #5 metric cap head screws.
The only non generic part was the plate holding the pump and brew head. The Espresso Gaggia had a nice plastic plate that held all components, and it fit well onto the chassis so I chose to use it instead of milling a custom solution. A custom plate would have been fairly easy to fabricate out of aluminum or a heat resistant plastic.
High voltage wiring
I chose to breadboard all the electronic components onto 1/8 inch thick acrylic panels bolted to the chassis. These were cut by hand but in the future will be cut on the CNC machine for better accuracy.
Many of the modules that make up the electronics did not have mounting holes so I used clear poster-tack adhesive, a rubbery 3mm thick substance which has worked well so far. It keeps things in place but allows them to be removed for replacement or programming.
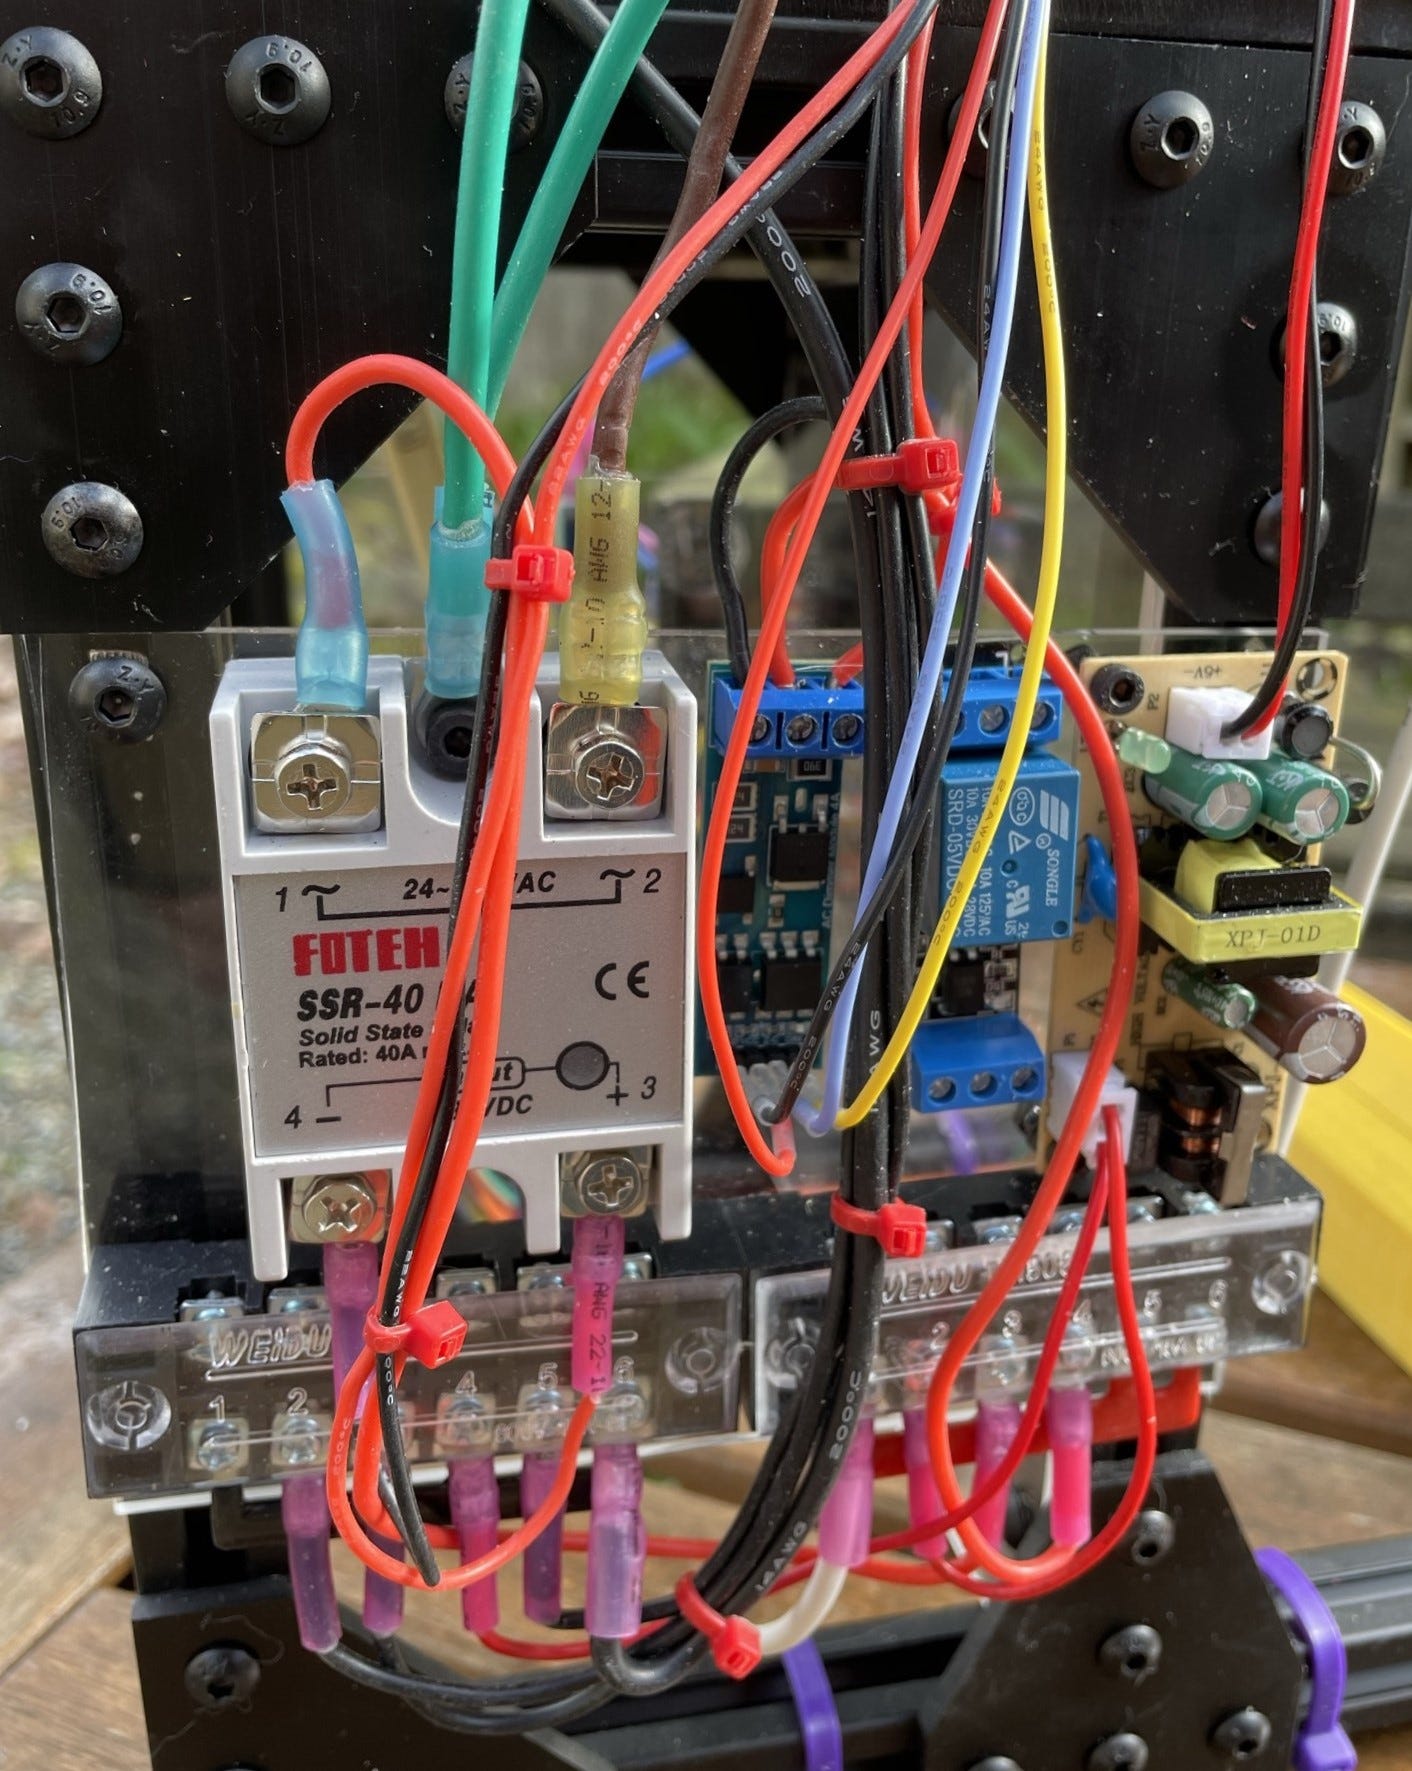
I used a distribution bar for the white and black AC leads, which helped to organize things but were too wide for the plastic mounting plate. My hope had been to mount this panel on the inside of the frame in the space between the legs, and then place a second clear panel over the dangerous 120 ac wiring. I plan on adding a cover for safety at the very least here, and will make the frame larger to accommodate a larger panel next time.
All wiring on this side was crimped using high quality silicon heat shrink connectors and a professional crimping tool where possible.
The 5 volt power supply (to the right of the picture) is now obsolete according to the Gaggiuino project, but it has worked well for me so far.
Power connector
I salvaged a 3 pin power connector and cord from an old PC power supply, and mounted it in a custom 3D printed bracket that bolted to the chassis.
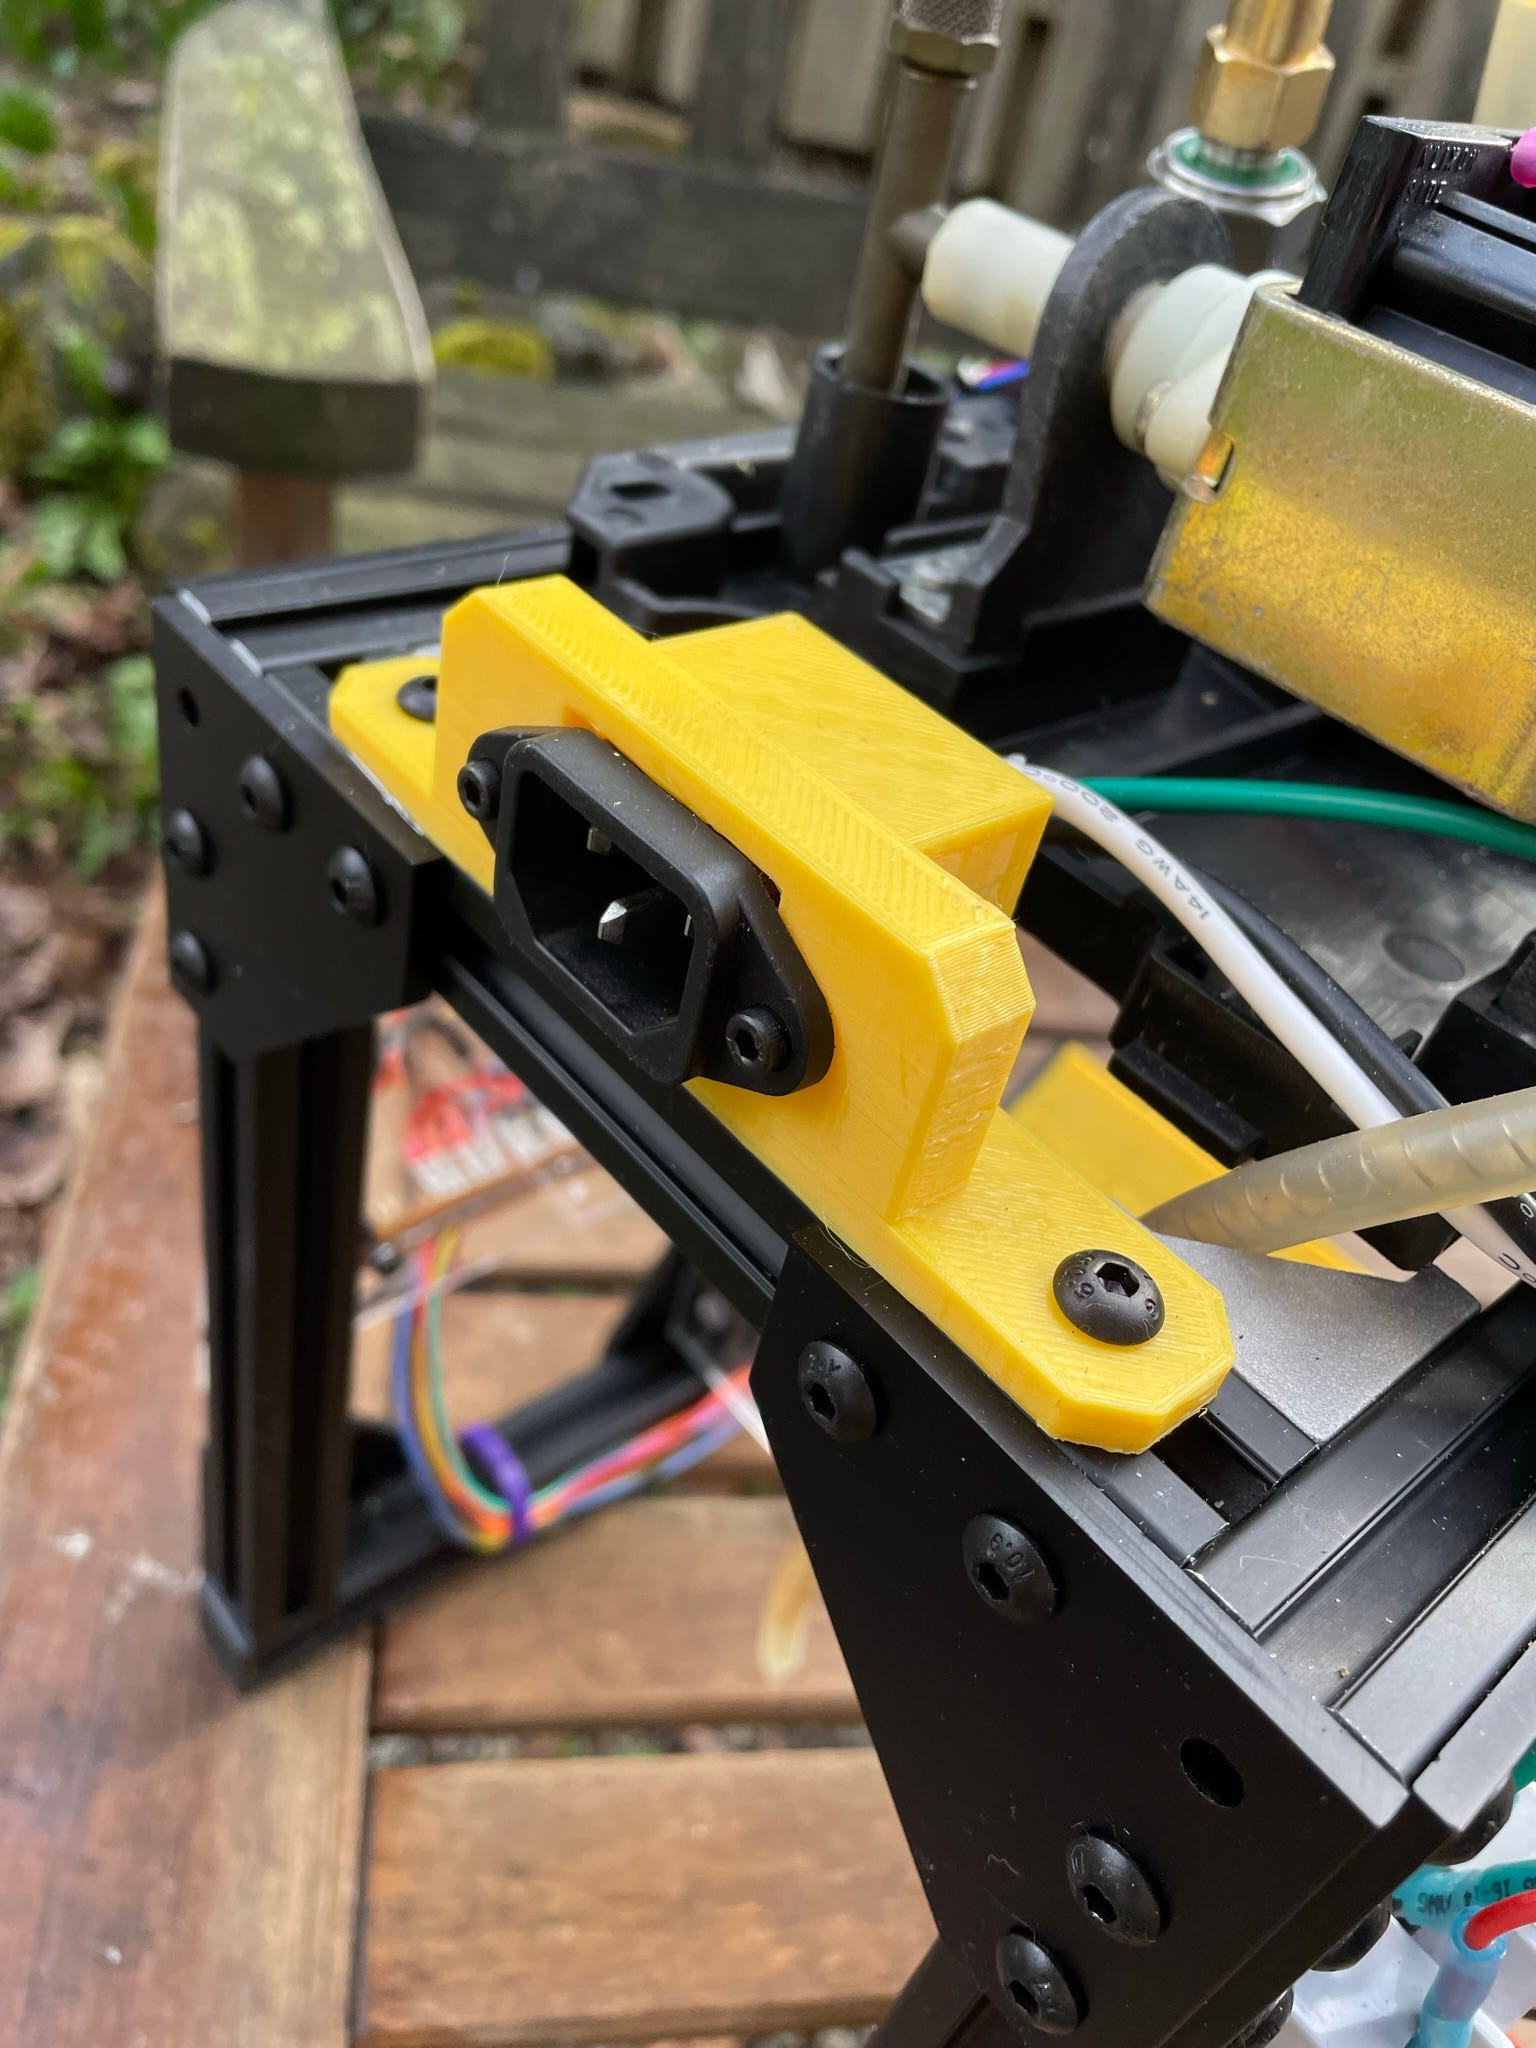
This protects the user from contact with 120 volt wiring and provides strain relief to the power cord.
Low voltage wiring
Like the high voltage wiring, the low voltage components are mounted on an acrylic panel. Where possible they are screw-mounted but not all components come with mounting holes, so those components are attached with poster-tack.
I made a +5v and a ground distribution panel out of perf board and Dupont pins.
All wiring was custom crimped and heat-shrink wrapped for security. Dupont connectors are not particularly robust but it is great to be able to re-wire things easily. Having a proper crimping tool for the connectors made a big difference.
Control panel
Because I scrapped my old cabinet I had to make a control panel for the chassis that held the new touch screen and replaced the old switches.
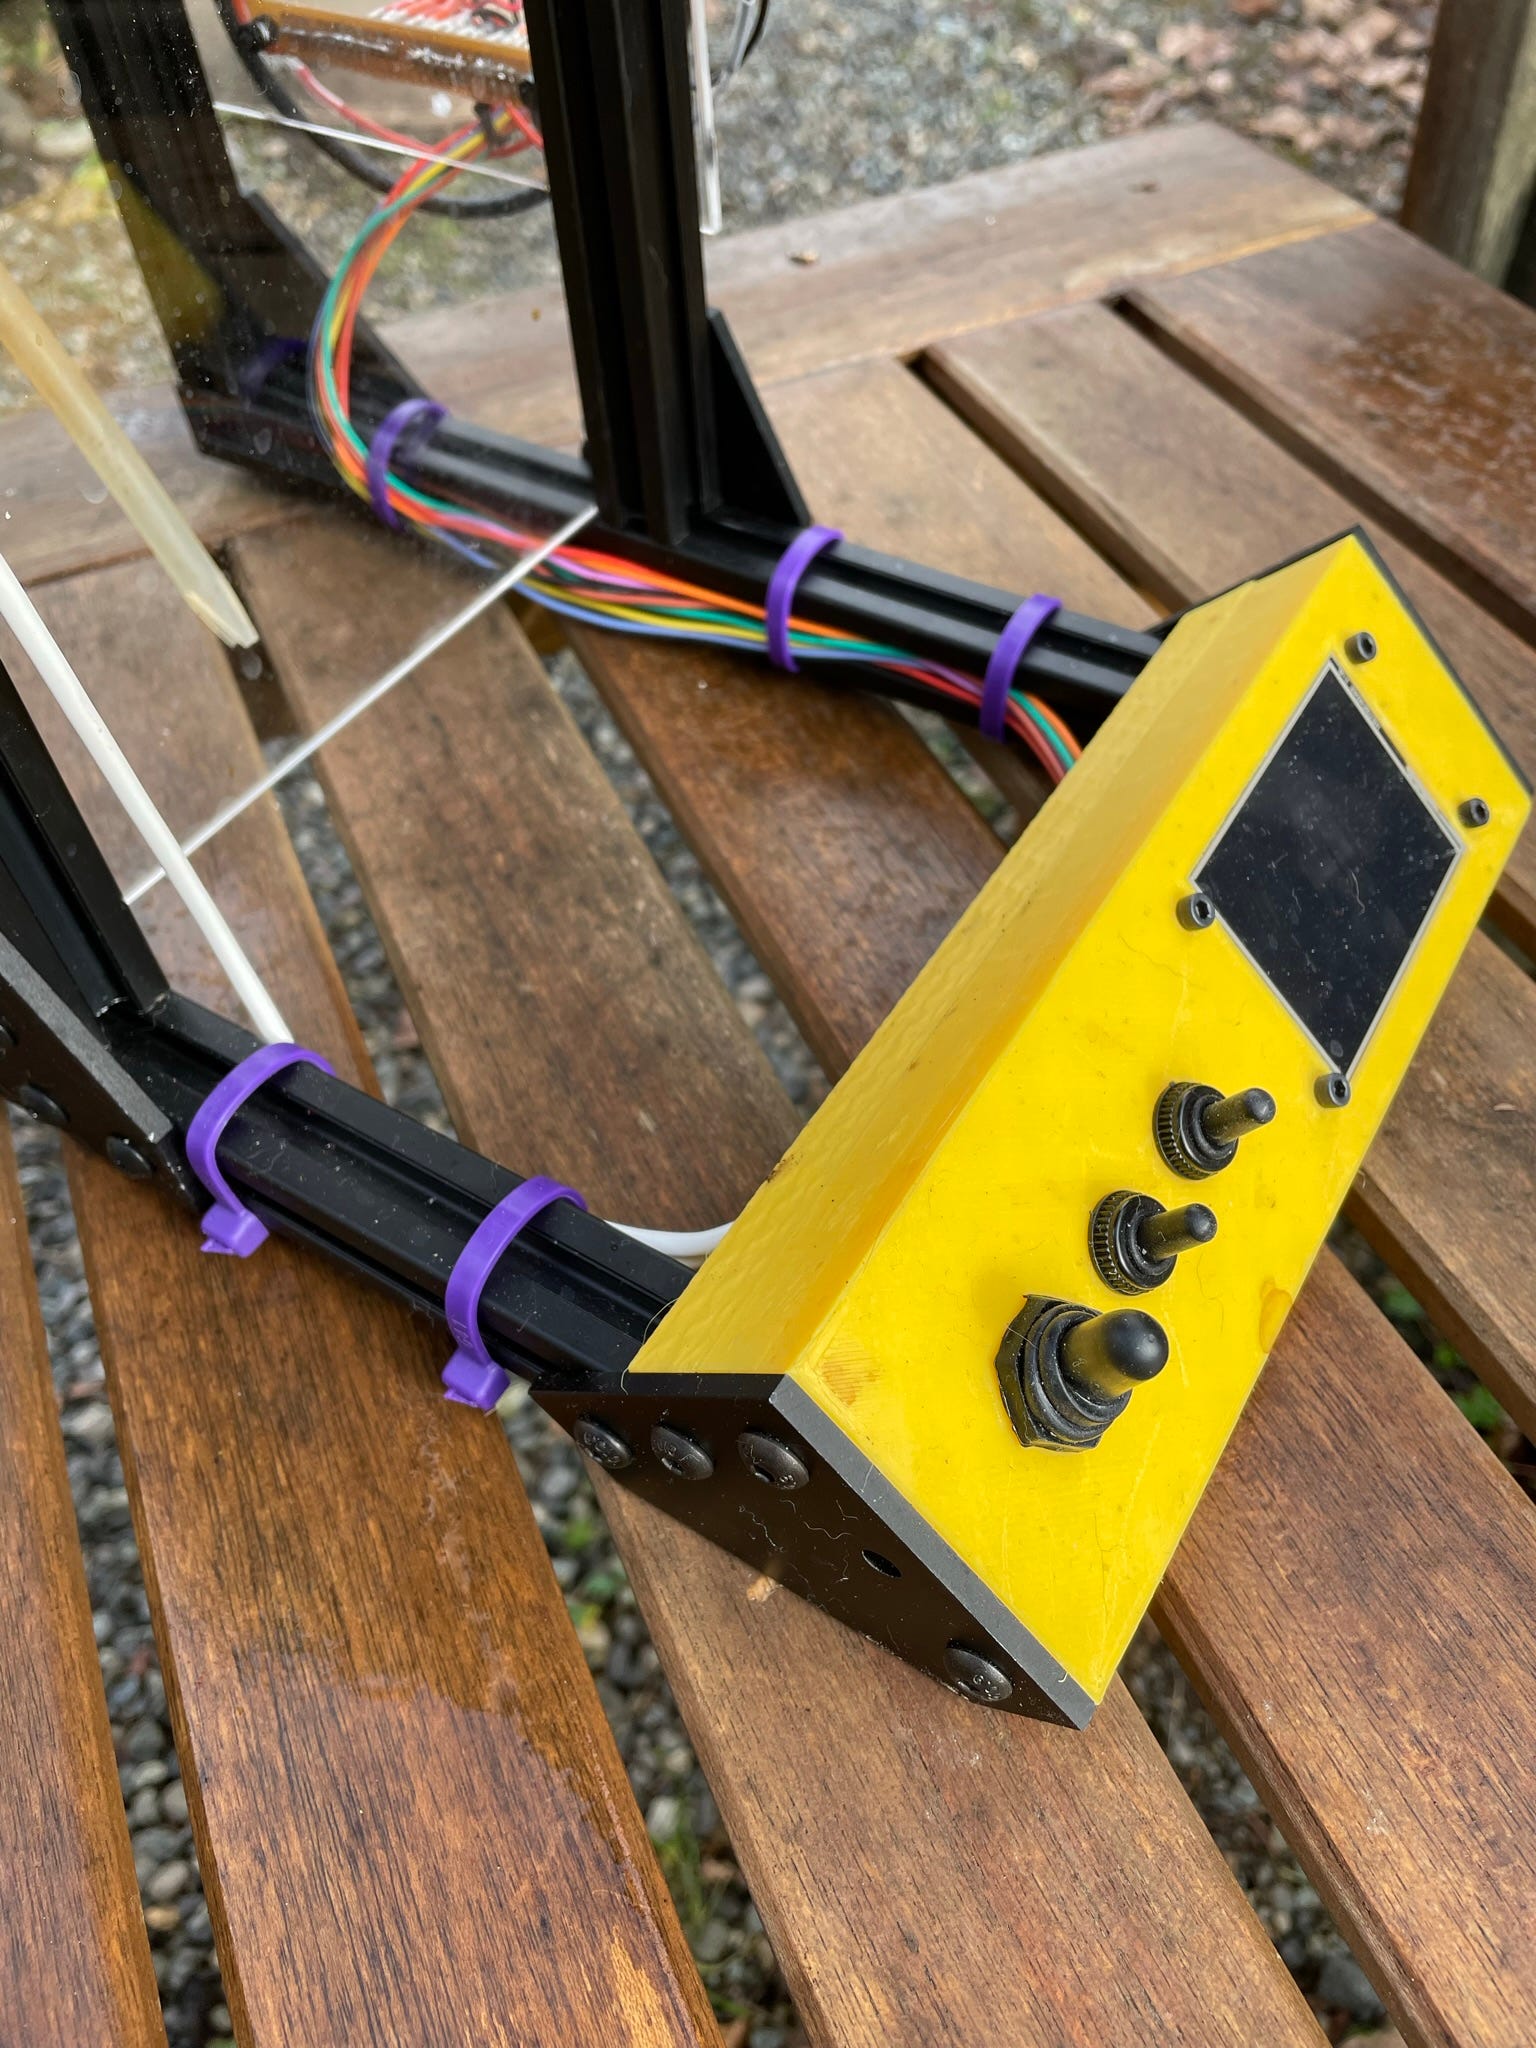
I used sealed toggle switches, with the largest on the left for power, and the next two for brewing and for steam. I’ll post the files on Thingiverse. The touch panel fit particularly well.
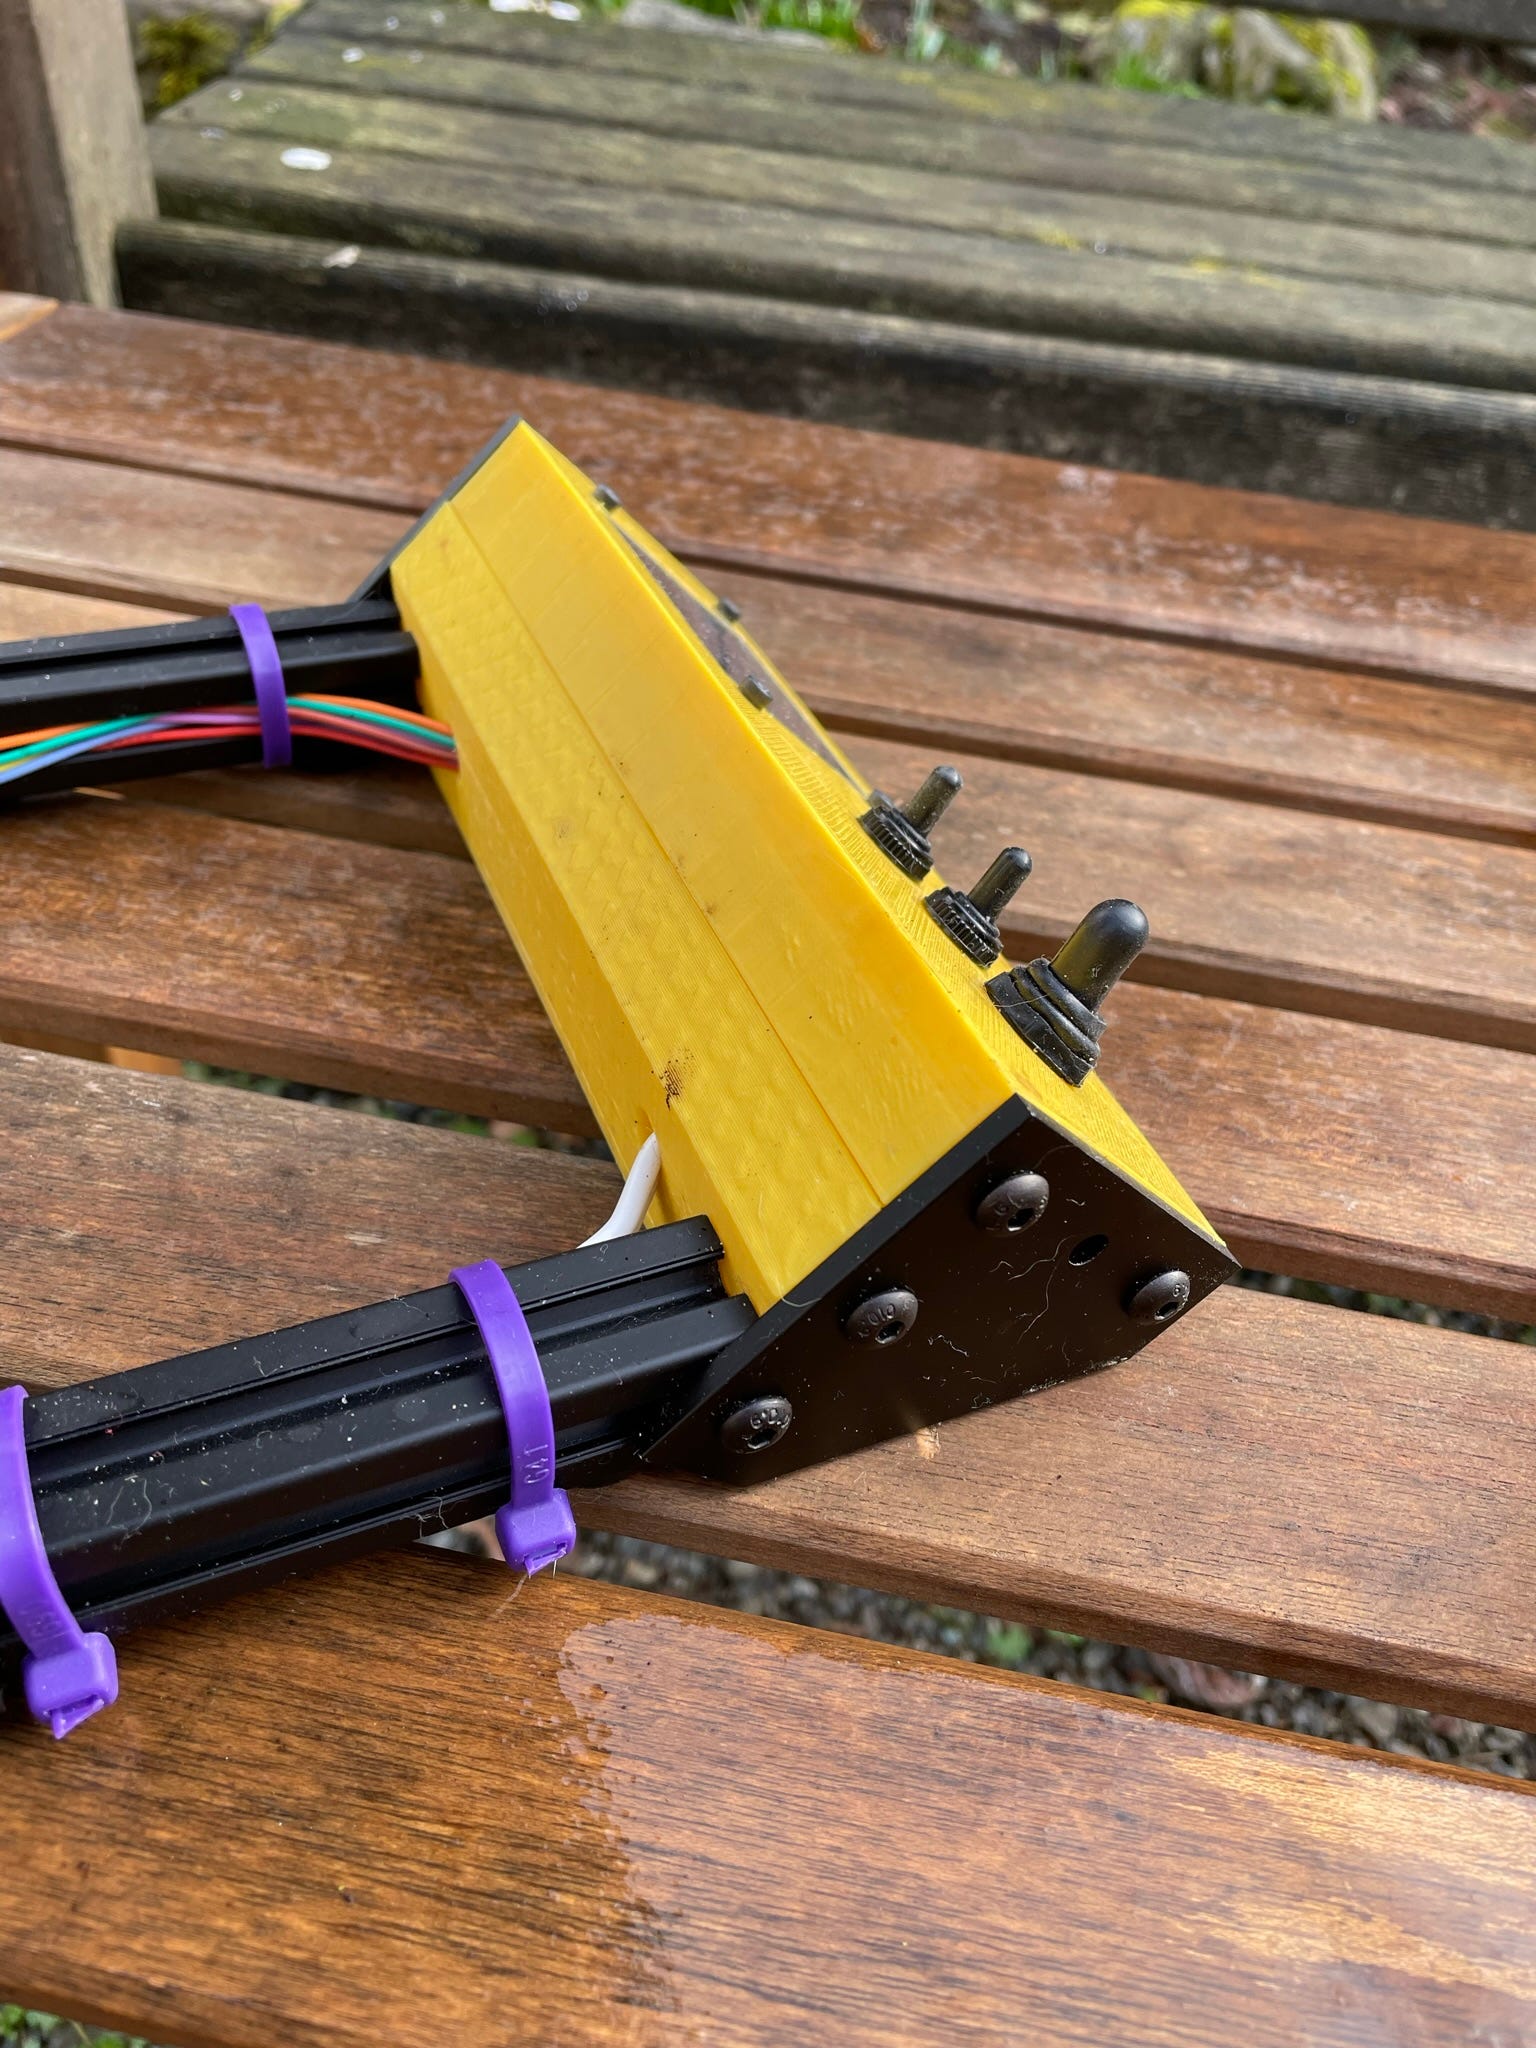
Extra re-enforcing panels were used to attach the panel to the chassis, and cable ties were used to route the wires. low voltage to one side and high voltage to the other.
Brew head
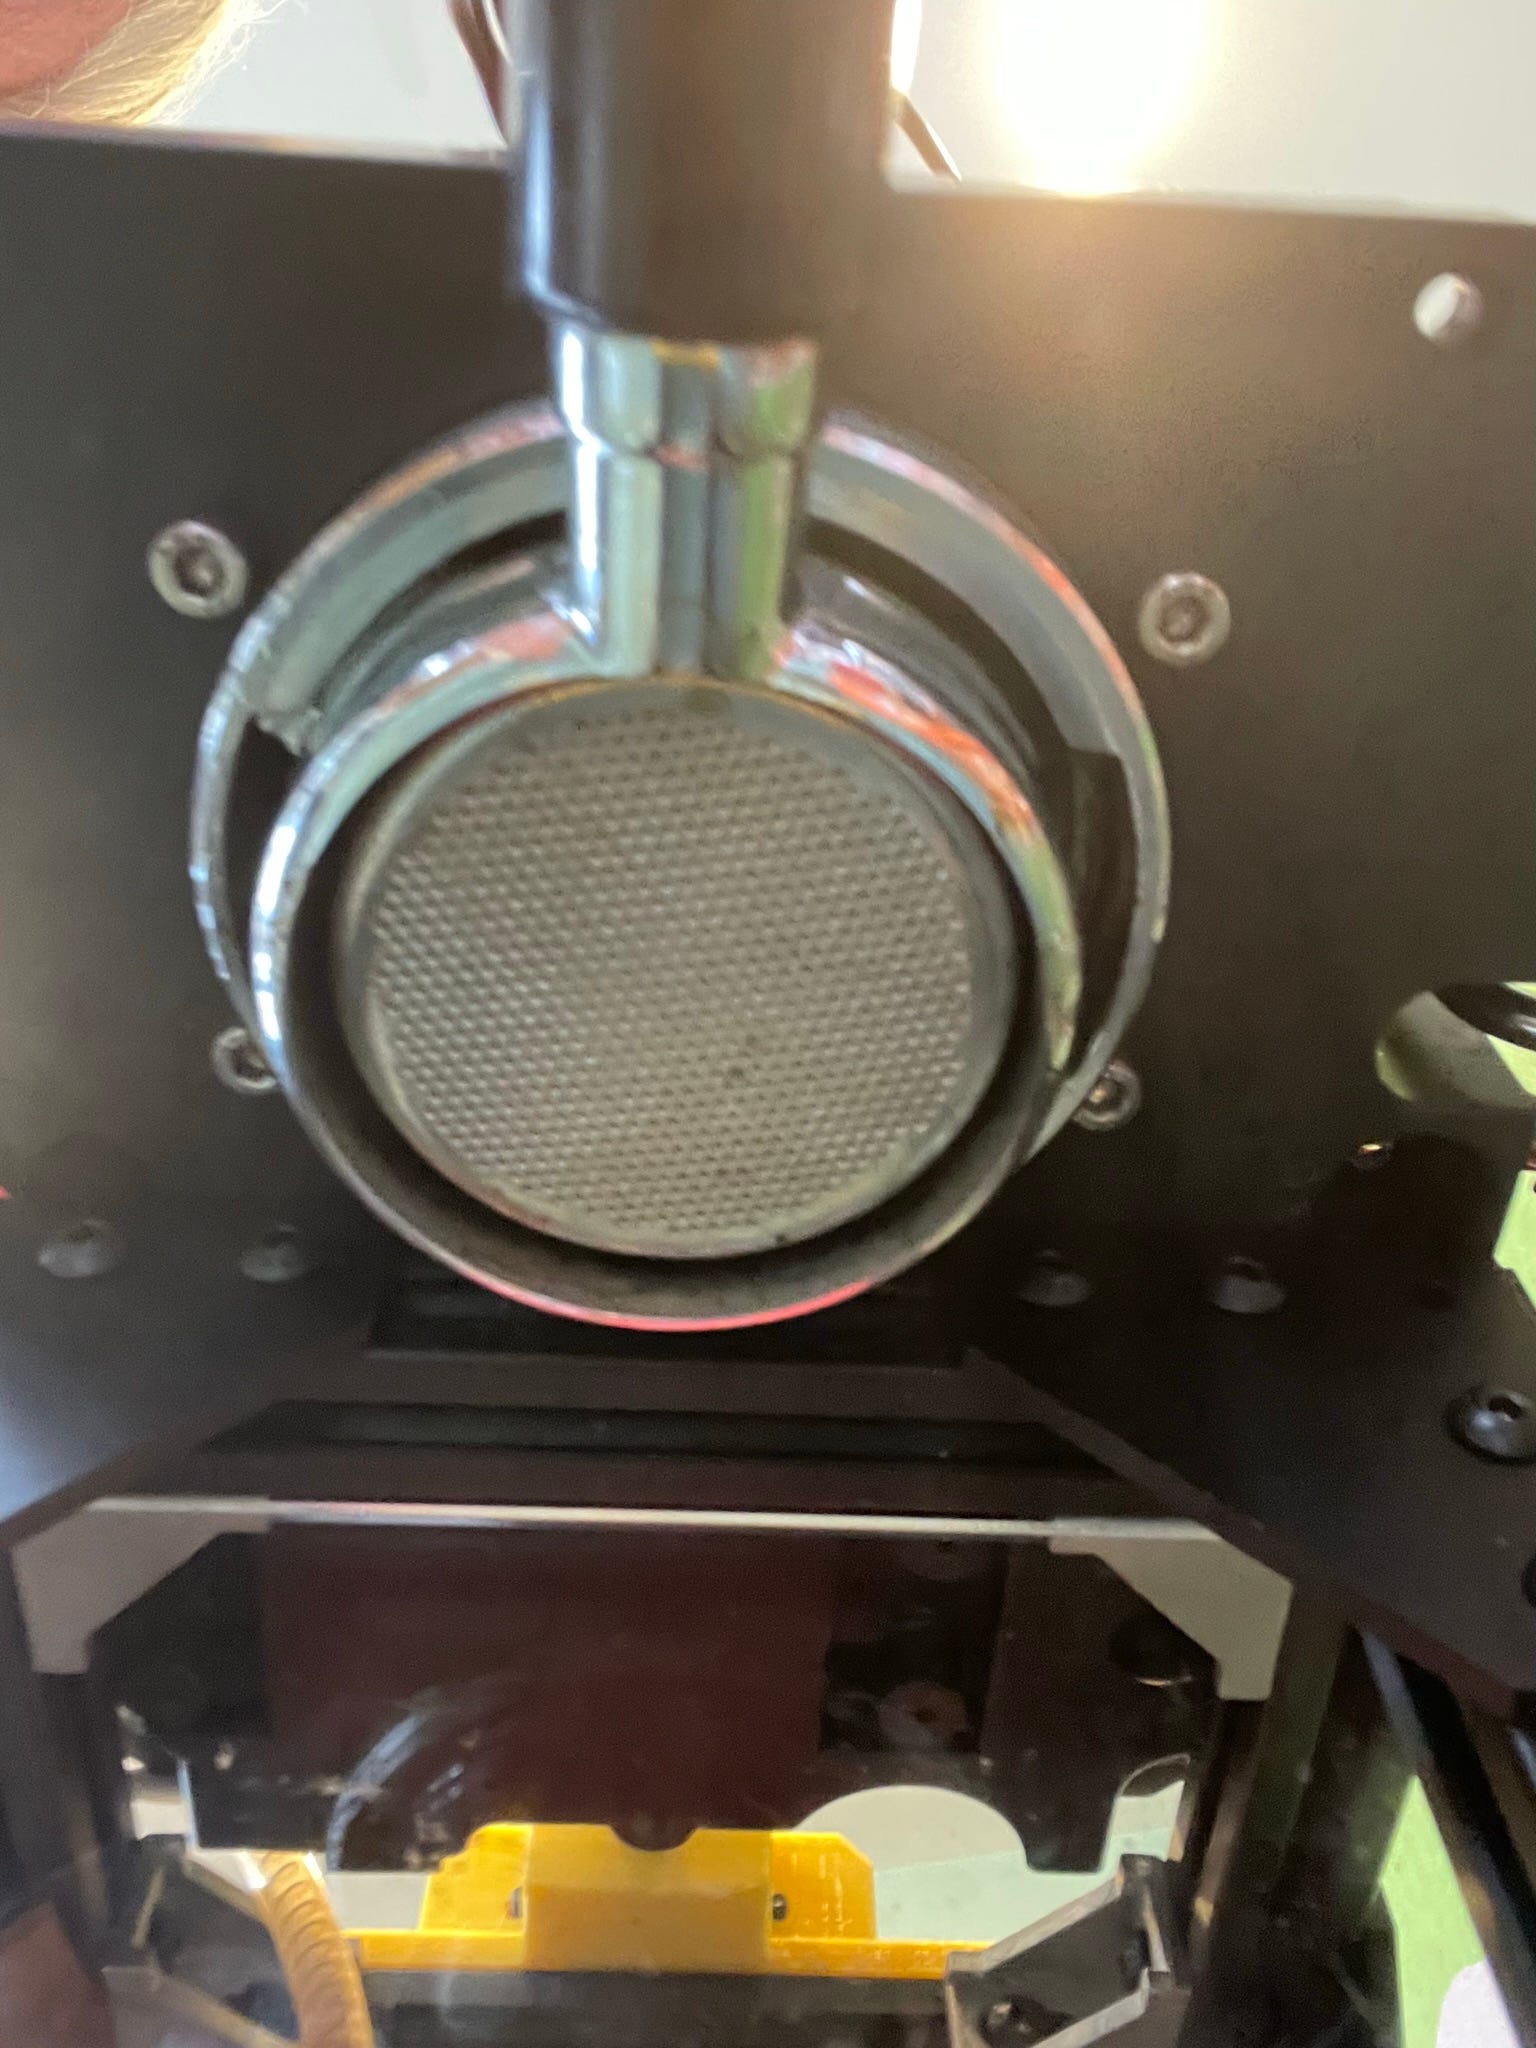
The portafilter is shown attached to the brew head.
Remaining work
I intend to build a cabinet for the machine. Be aware that in its current form it suffers from several flaws:
It has an exposed boiler, which is a burn hazard.
I’ve made an effort to secure the 120 volt wiring, but all of it should really be in an enclosure and protected from any human contact. The solid state relay is particularly exposed.
The low voltage wiring uses crimped Dupont connectors, which are not particularly robust, but very handy for experimentation. In a production environment I’d suggest a more secure way of wiring the microprocessor.
There is currently no drip tray or cup holder, which makes room for scales and other future features.
The Gaggiuino project is currently making a circuit board to hold the components used here. I hope my next version will take advantage of that advance.
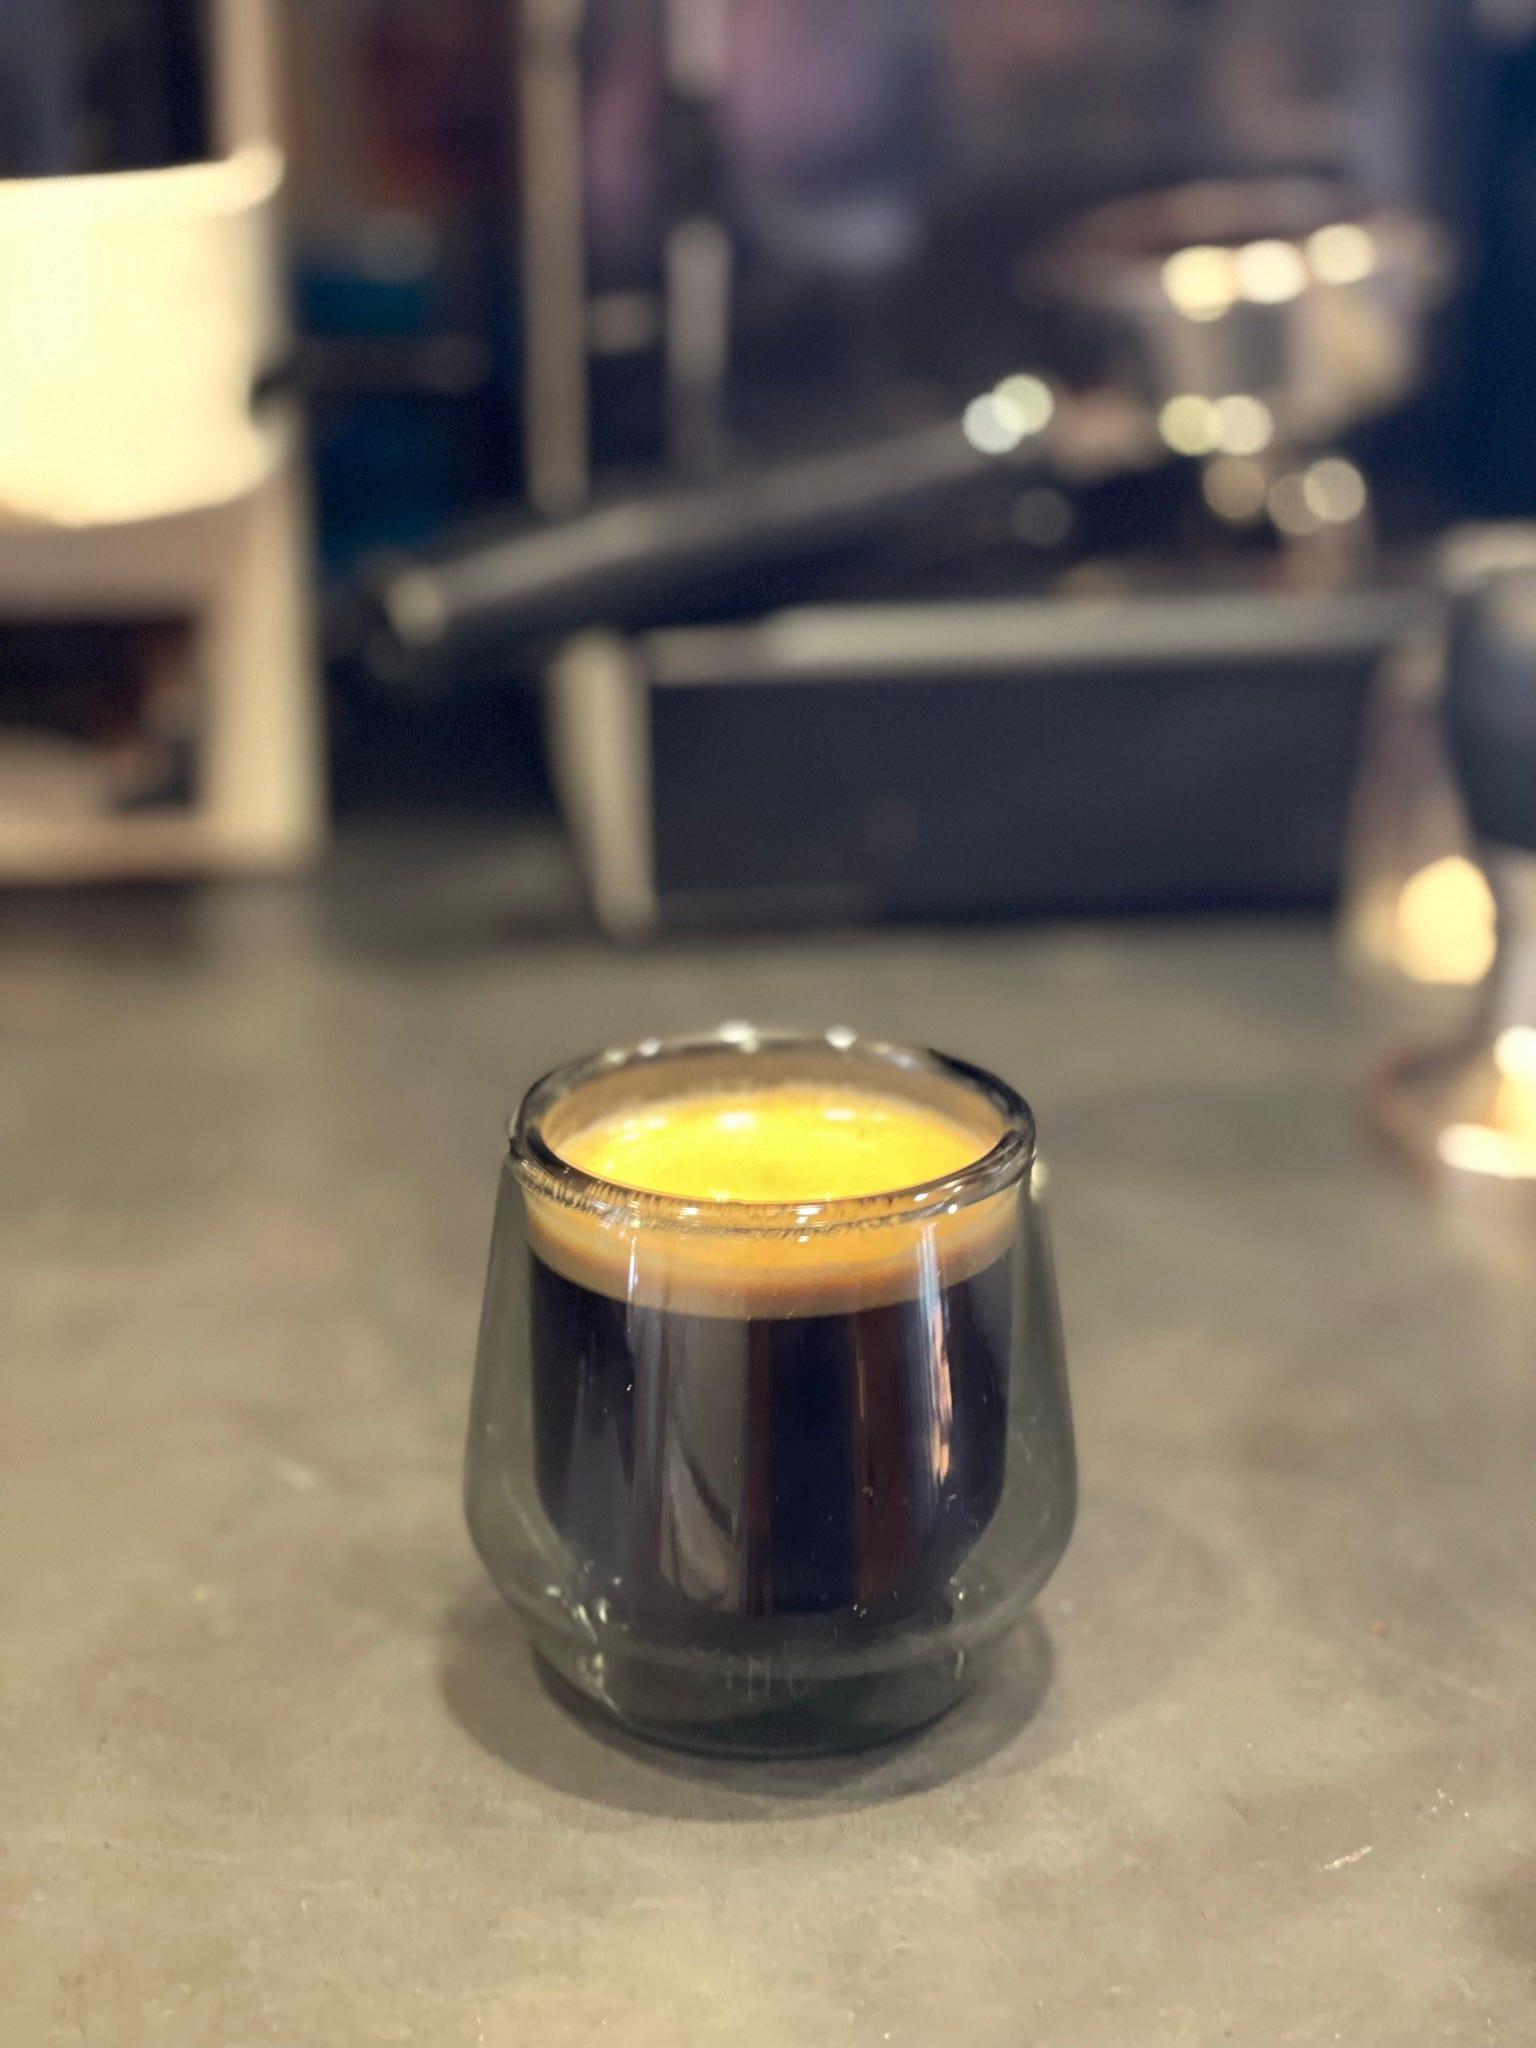
So, Does it work?
After a few false starts and gasket failures, yes.
It turns out that I had assembled the boiler and pump a few months ago to keep the parts together without adding new gaskets and O-rings. Ooops - that caused some minor flooding the first time I plugged it in and ran it. A few updates later it was completely water and steam tight, and all sensors worked perfectly.
My first shot of coffee was a little fast and under-extracted. The grind needs to be finer and some settings in the software may need to be adjusted. Oddly the grind works just fine on my stock Gaggia Classic Pro, which runs at a much higher pressure. One step at a time.
In any case, the machine works, and is mostly made up of commodity prototyping hardware and 3D printed parts. The proprietary parts, which are primarily the brew head, the boiler and the steam wand can be purchased from any parts supplier who supports Gaggia, or salvaged from an old machine like I did.


Credits
This project would not exist without the inspiration and support of the Gaggiuino Project, its founder Zer0-bit, and their excellent software.
Looks like I'll have to buy an old (broken) espresso machine and start diying .. amazing project. Looks totally awesome
Great, looking forward an update on this project